この記事の要点
- 受注: Mechanic
- クリア条件: Lighthouse(灯台)で V3 Flash drive を入手する(ほか3件)
- 主な報酬: 経験値 +32,000
1. タスク名とは?
「Getting Acquainted(仲良くなる)」は、Mechanic(メカニック)から受注する、Lighthouse(灯台)マップに関連するクエストです。
2. タスクの基本情報
- 受注トレーダー: Mechanic(メカニック)
- 報酬:
- 経験値(EXP)+32,000
3. クリア条件
以下の条件をすべて達成する必要があります。
- Lighthouse(灯台)で V3 Flash drive を入手する
- Radio transmitter(無線送信機)を再フラッシュ(Reflash)する
- Flash drive(フラッシュドライブ)をMechanic(メカニック)に渡す
- lighthouse building(灯台の建物)を訪れる
4. 必要アイテム
| アイコン | アイテム名 | 用途 | 入手方法・備考 |
|---|---|---|---|
 |
Secure Flash drive V3 | クエストアイテム | Lighthouse内の指定の場所から入手。獲得時に自動的にクエストアイテムとして登録されます。 |
 |
Rogue USEC barrack key | 鍵 | Building #3内の部屋を開けるために使用。※すべての場所で必須ではありません。 |
 |
Water treatment plant storage room key | 鍵 | Building #2の保管部屋を開けるために使用。※すべての場所で必須ではありません。 |
おすすめ関連記事
【タルコフ】PCを買い替えるべきタイミング、パーツ交換で十分なケースとの分かれ目
「最近カクつきが増えた気がする」「アップデート後、明らかに重くなった」——PCの調子が悪いと感じたとき、多くの人が悩むのが「パーツを1つ交換すれば直るのか、それ...
5. 攻略手順
このクエストは、Lighthouse(灯台)の特定のエリアを探索し、特定の機器を操作することで進めることができます。
1. V3 Flash driveの入手
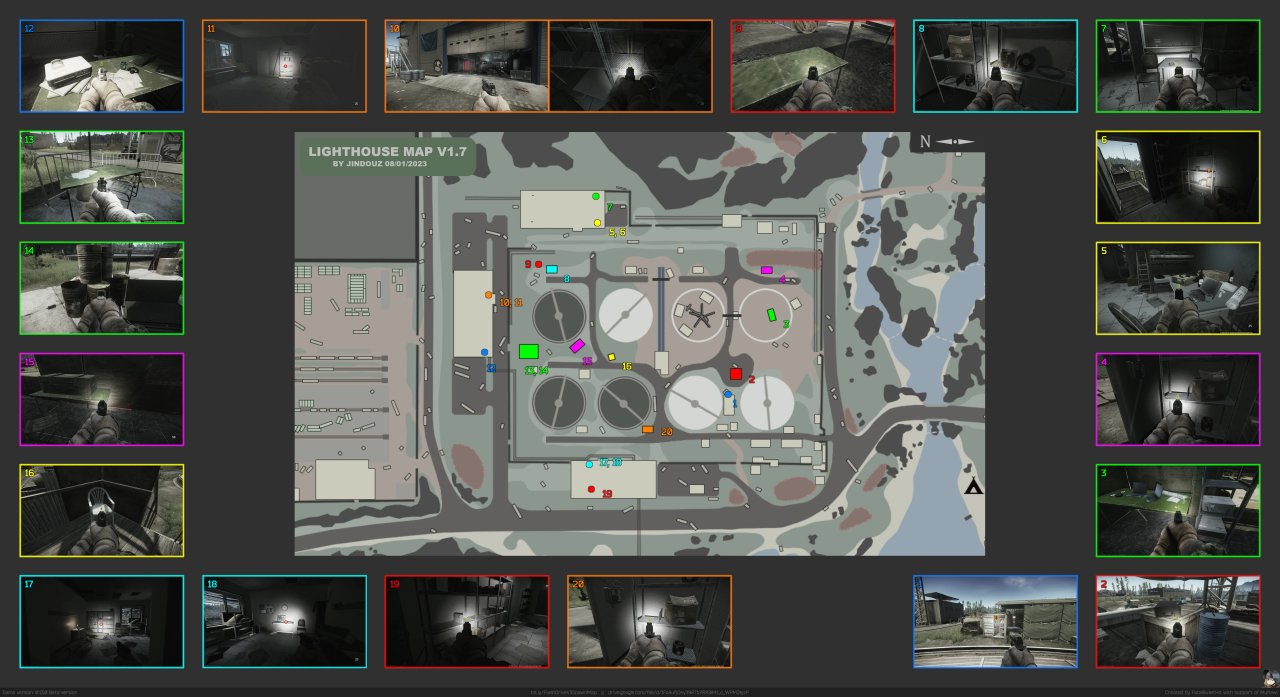
Lighthouse(灯方)内には、V3 Flash driveのスポーン地点が多数存在します。以下の場所を探索しましょう。
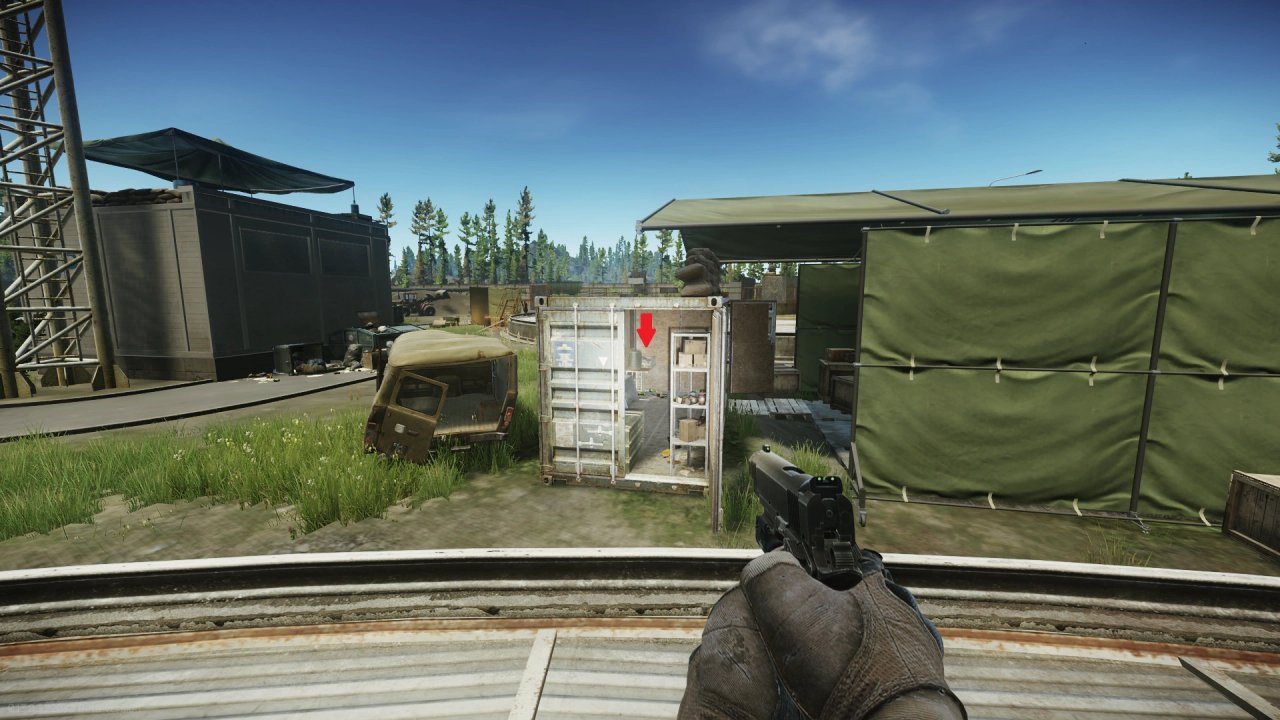
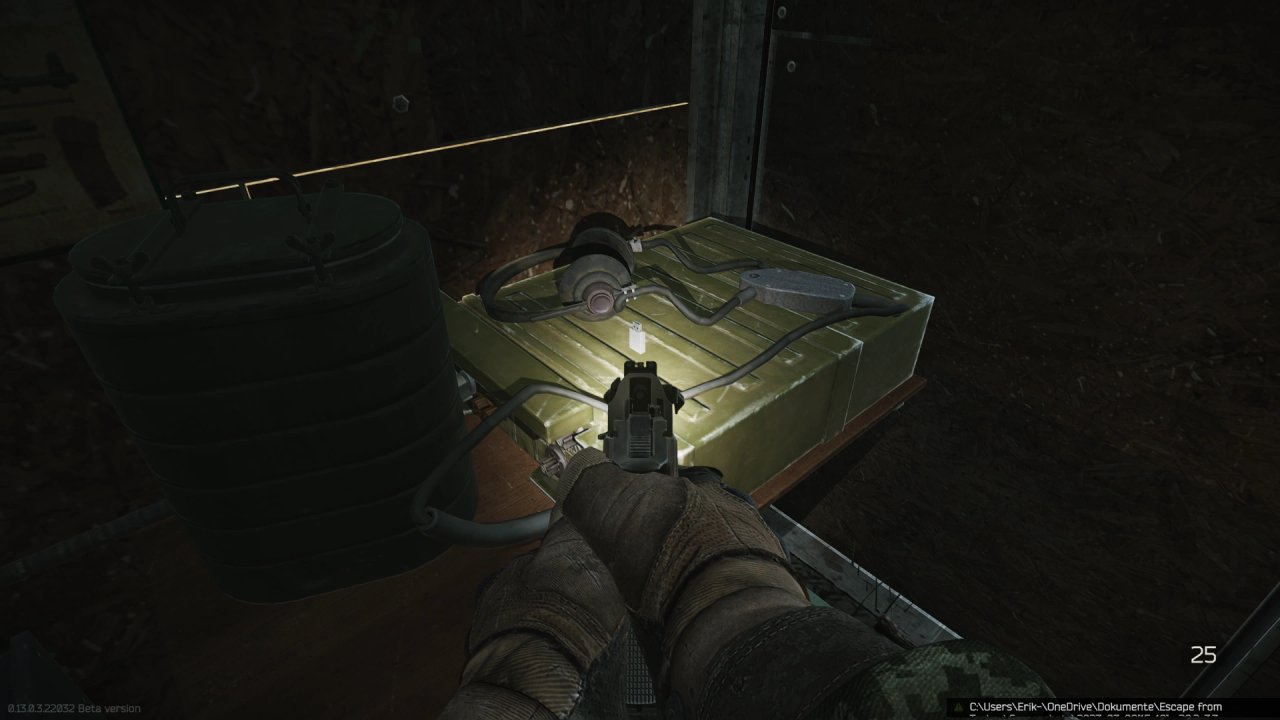
- 南西のコンテナ(Southwestern container): 南の塔の西側にある青いコンテナ内の、無線システムの上のデスク。
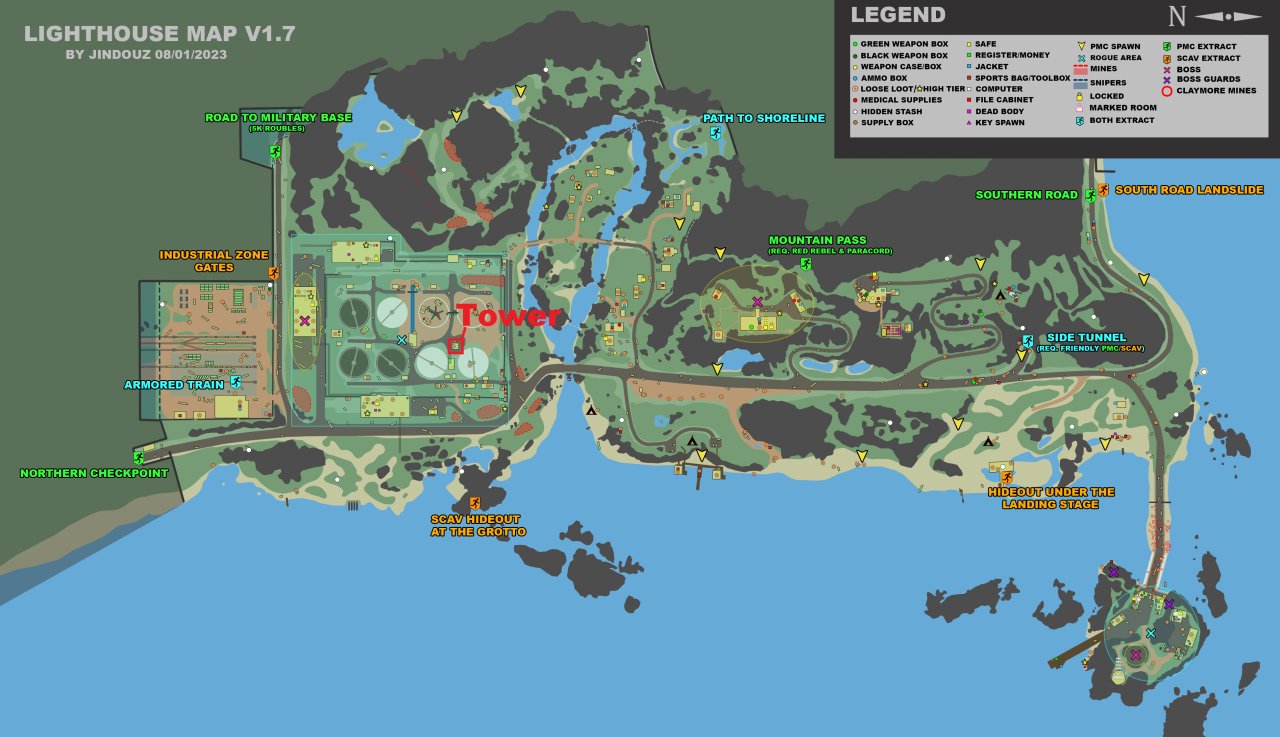
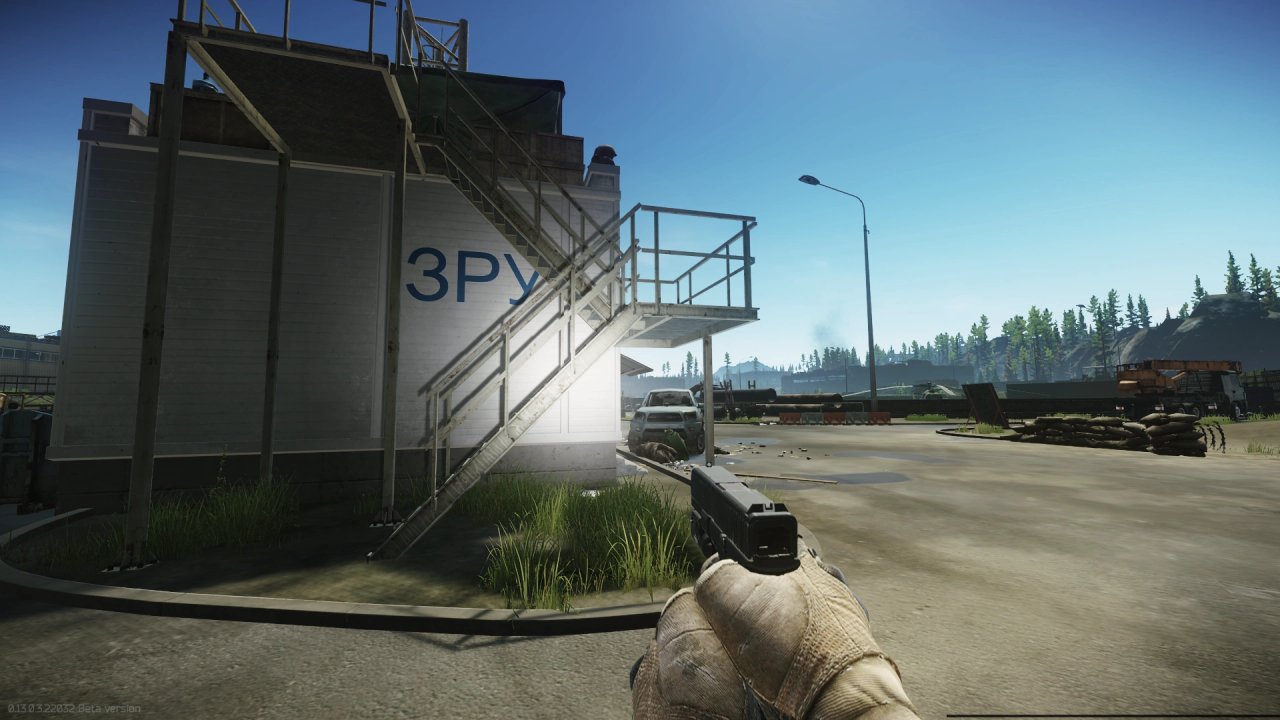
- 南の塔(Southern tower): 「ЗРУ」と書かれた南の塔にある、武器ボックスの隣の木箱。
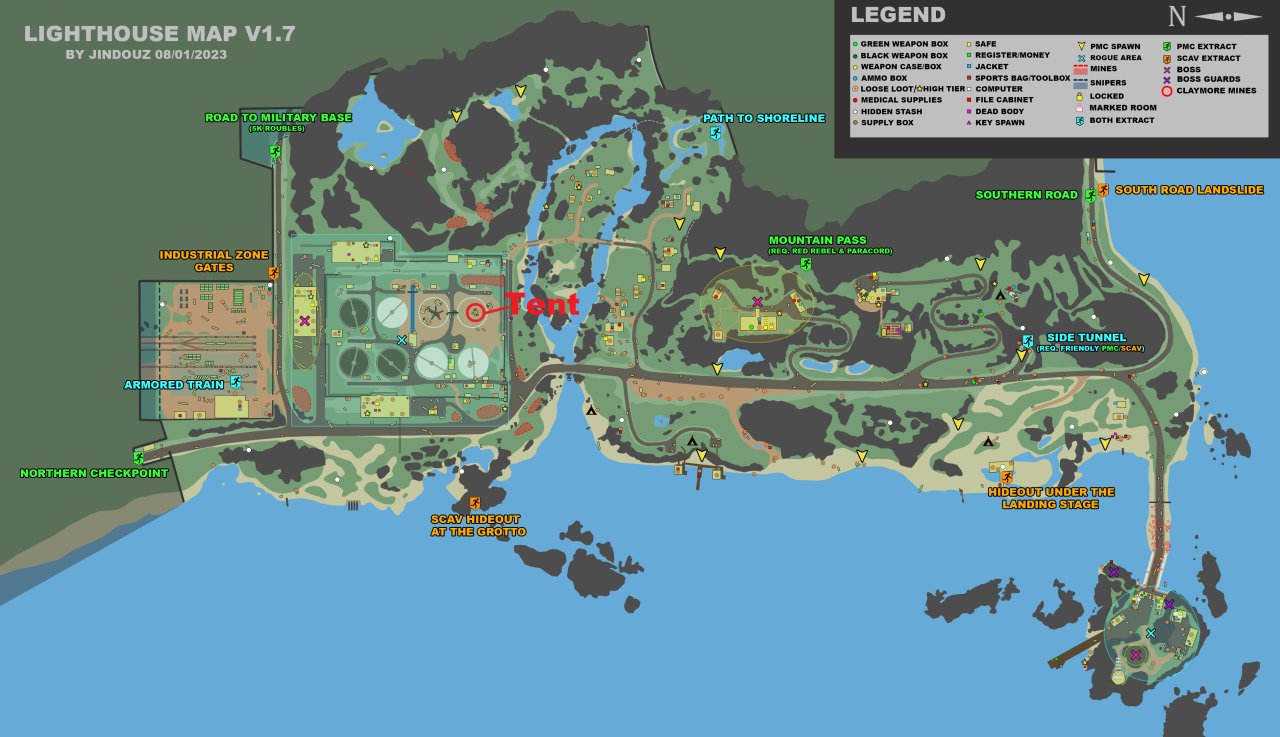
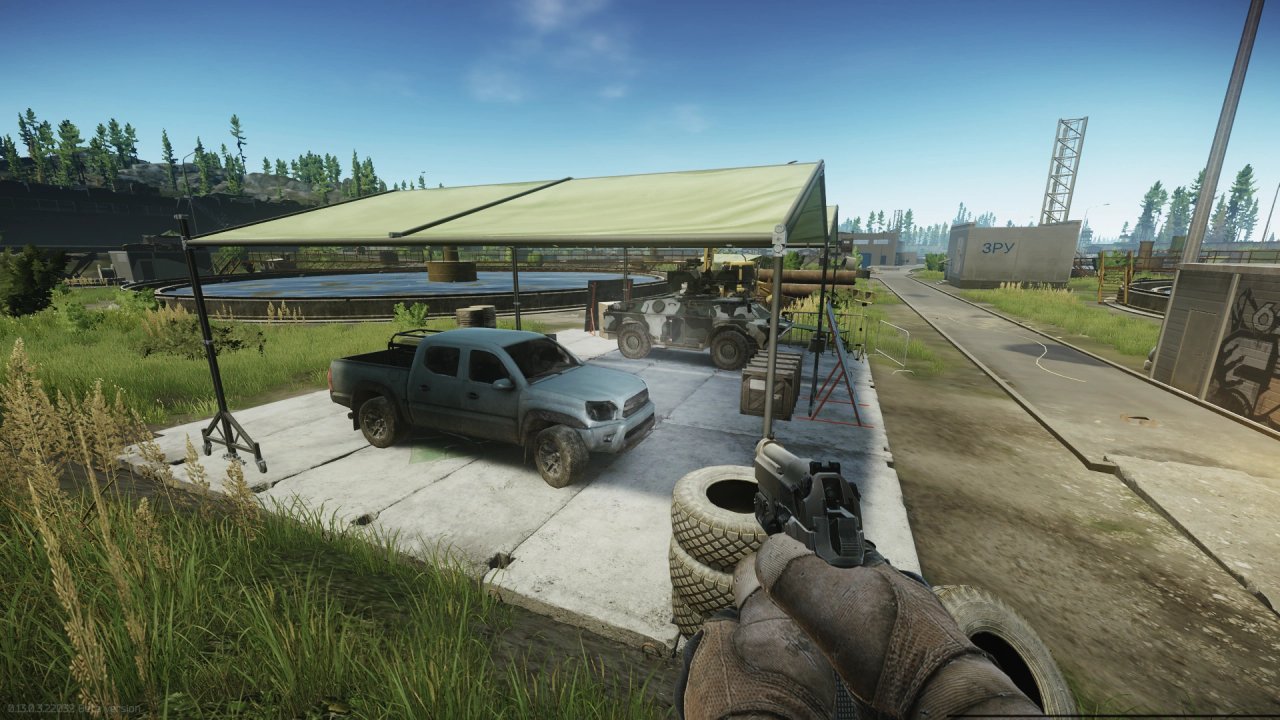
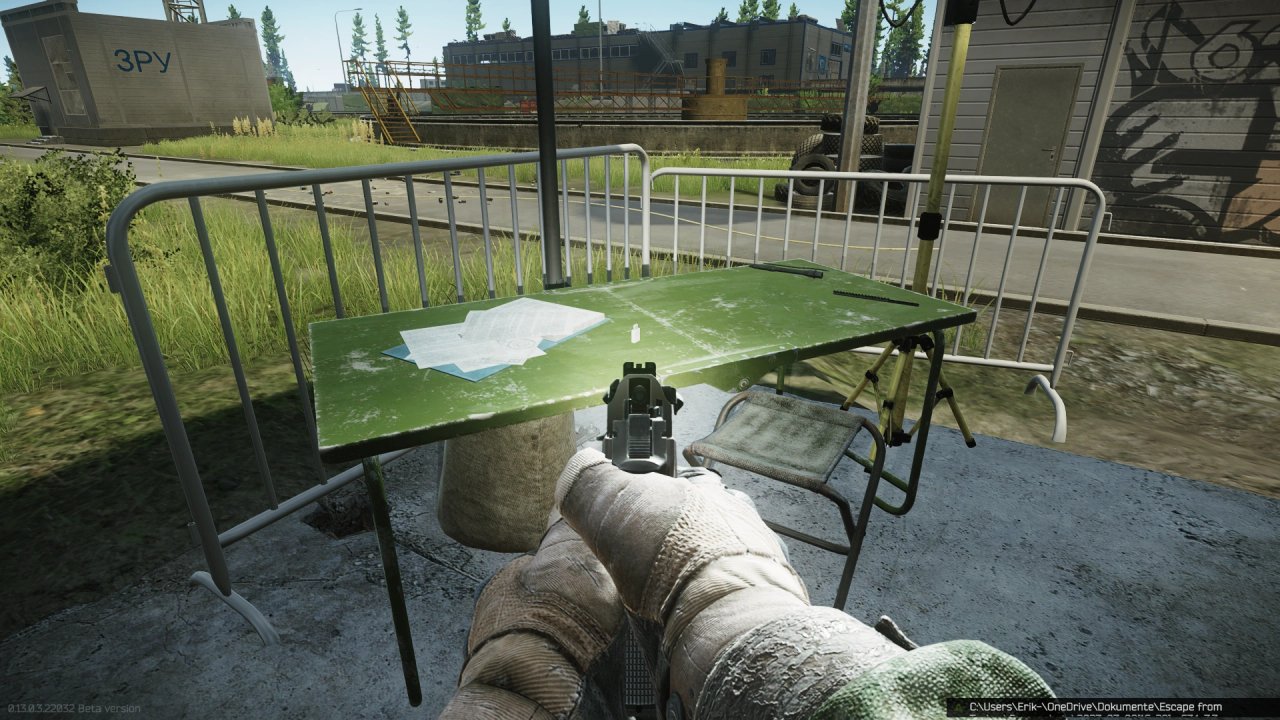
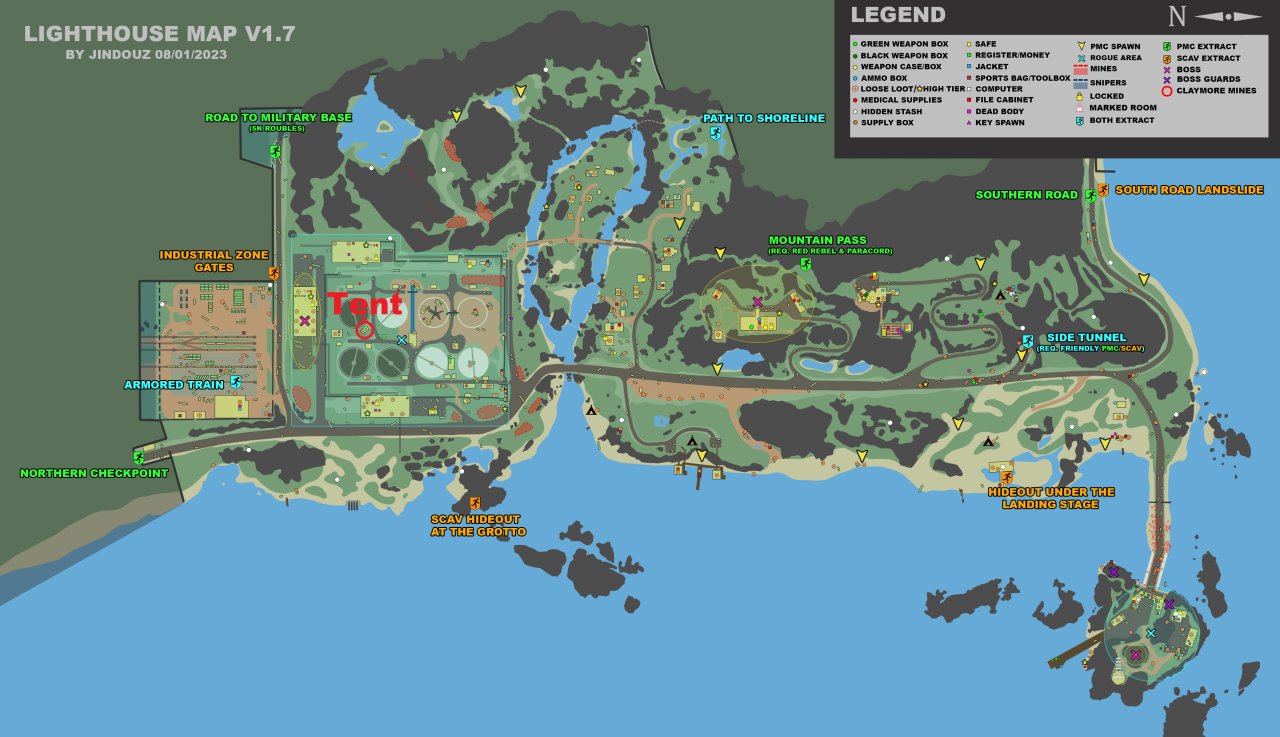
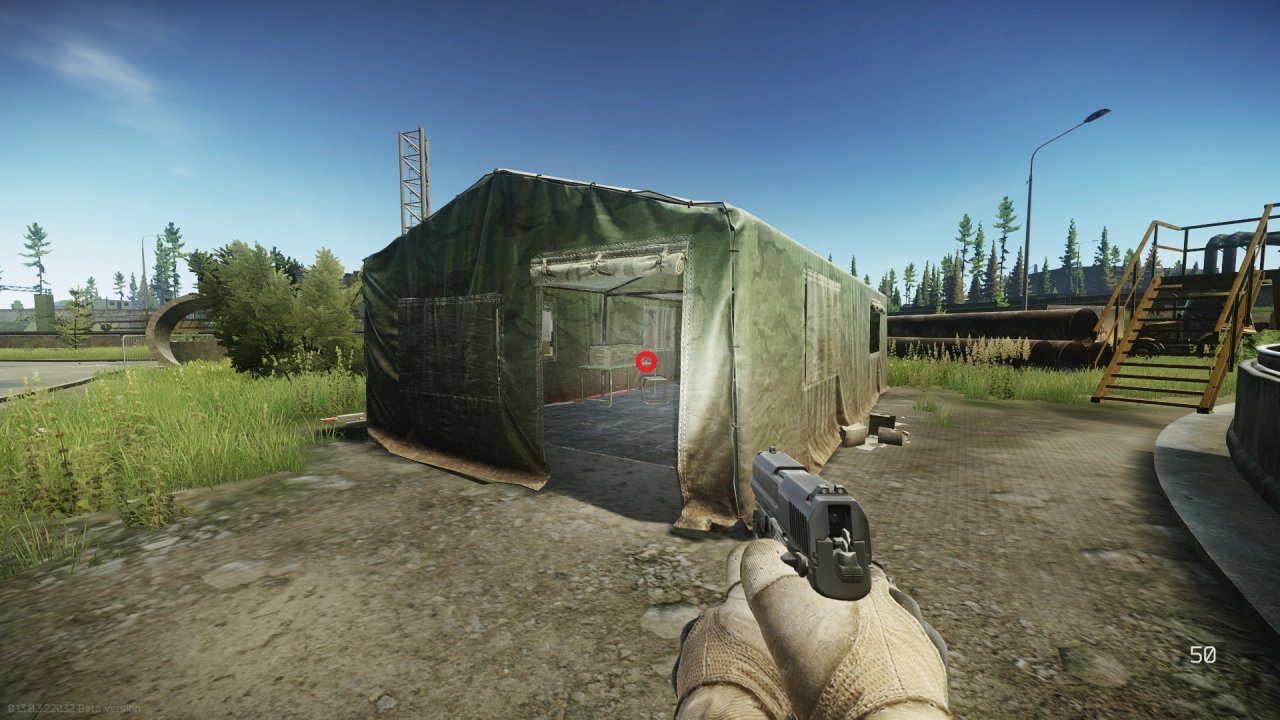
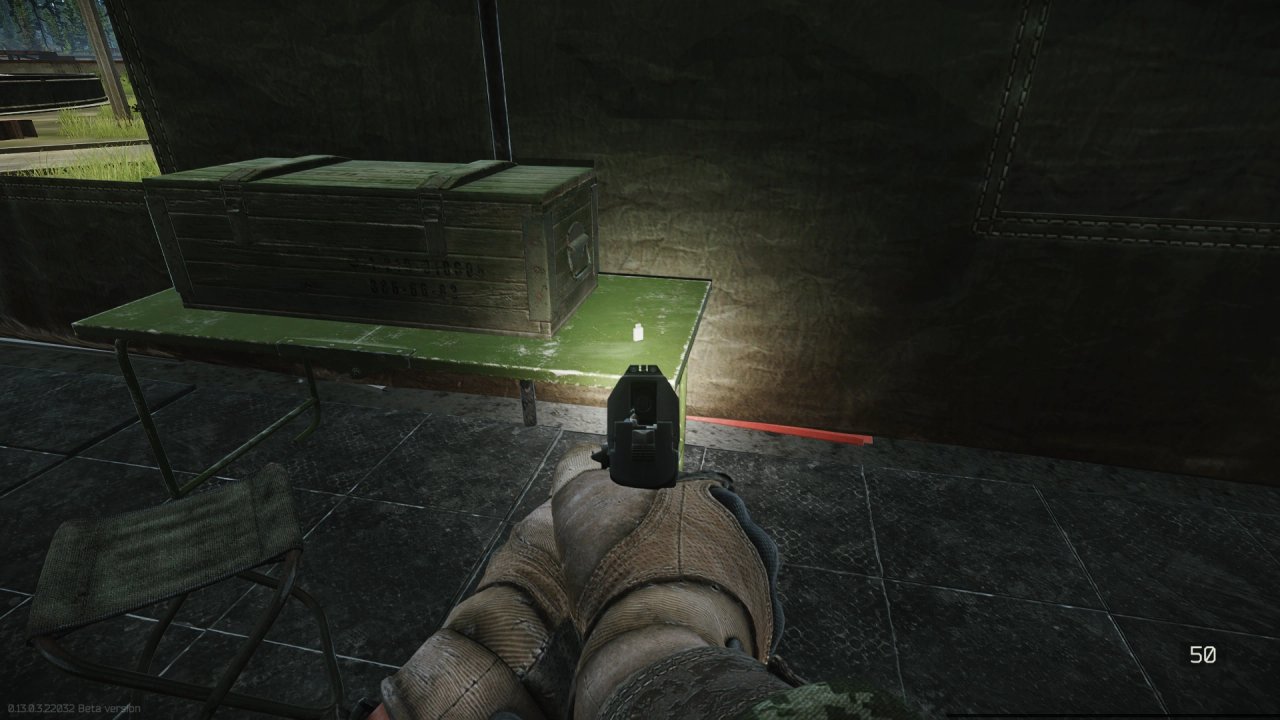
- 南東の貯水池テント(Southeastern water basin tent): 南東の貯水池にある軍用テント内のテーブル。
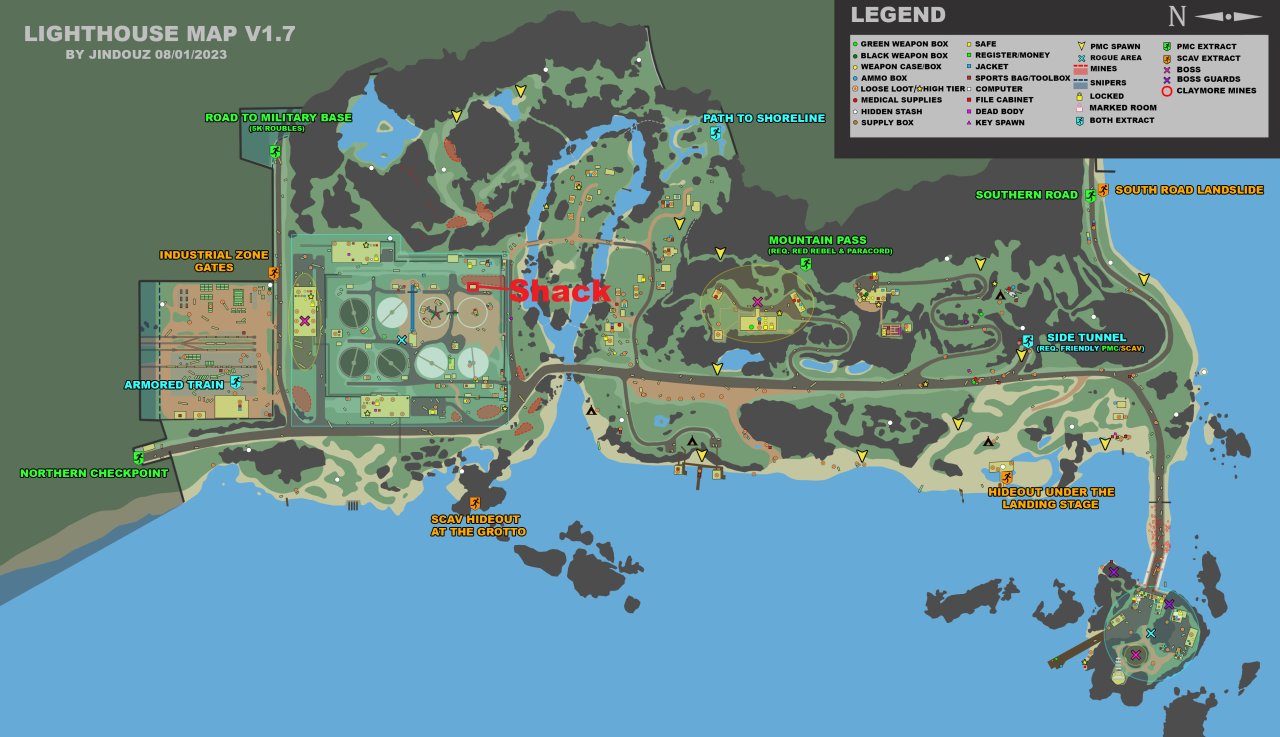
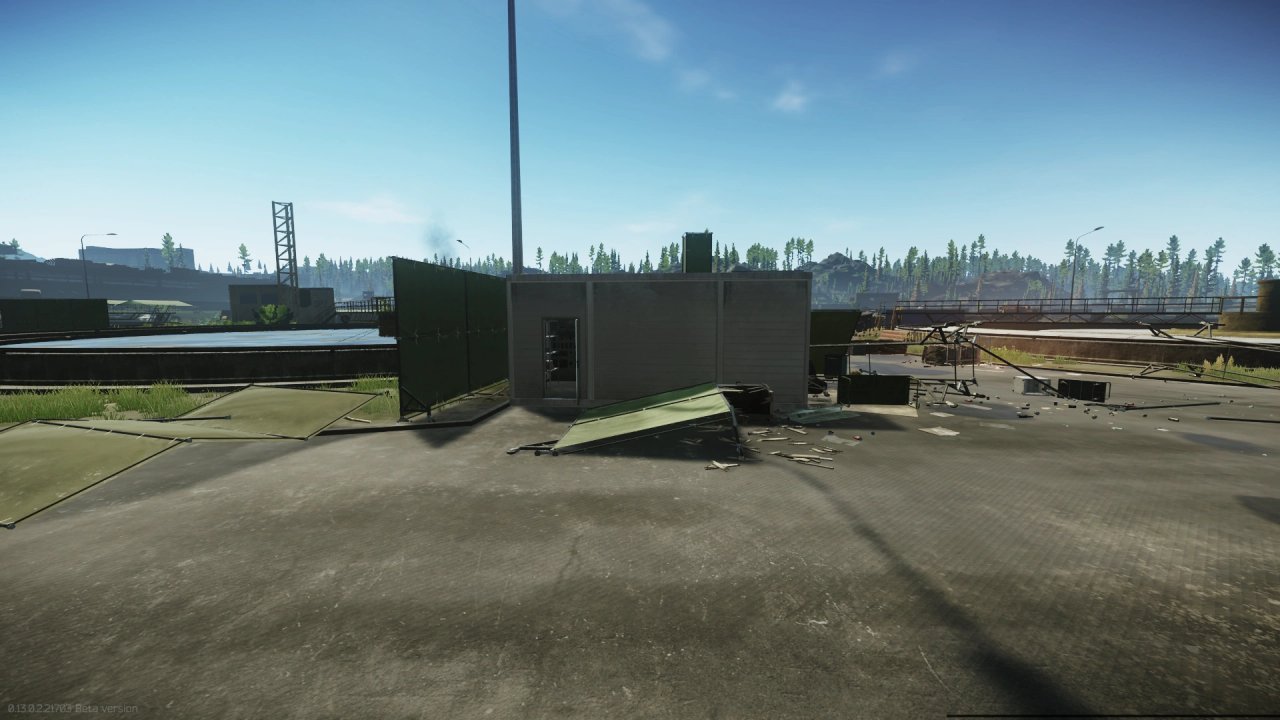
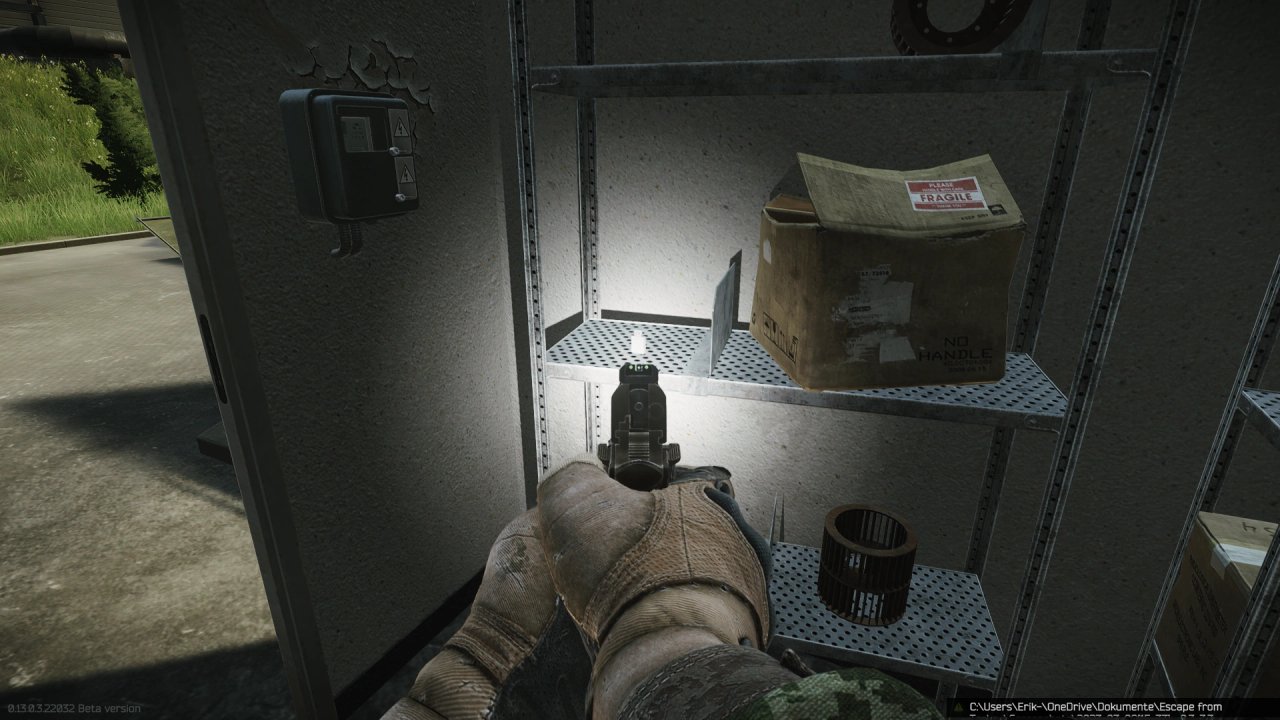
- 南東の小屋(Southeastern shack): 南東にある電気操作用小屋の金属棚。
- Building #3:
- Rogue USEC barrack(強盗USEC兵舎)内のデスク。
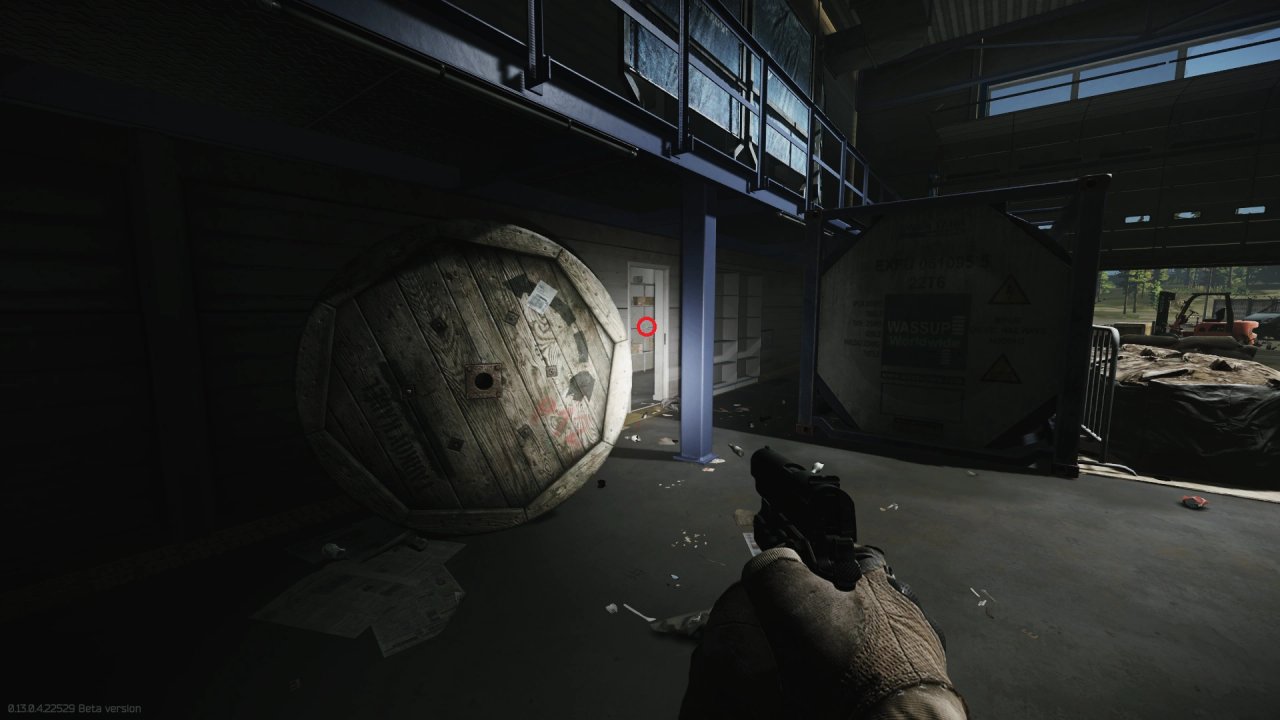
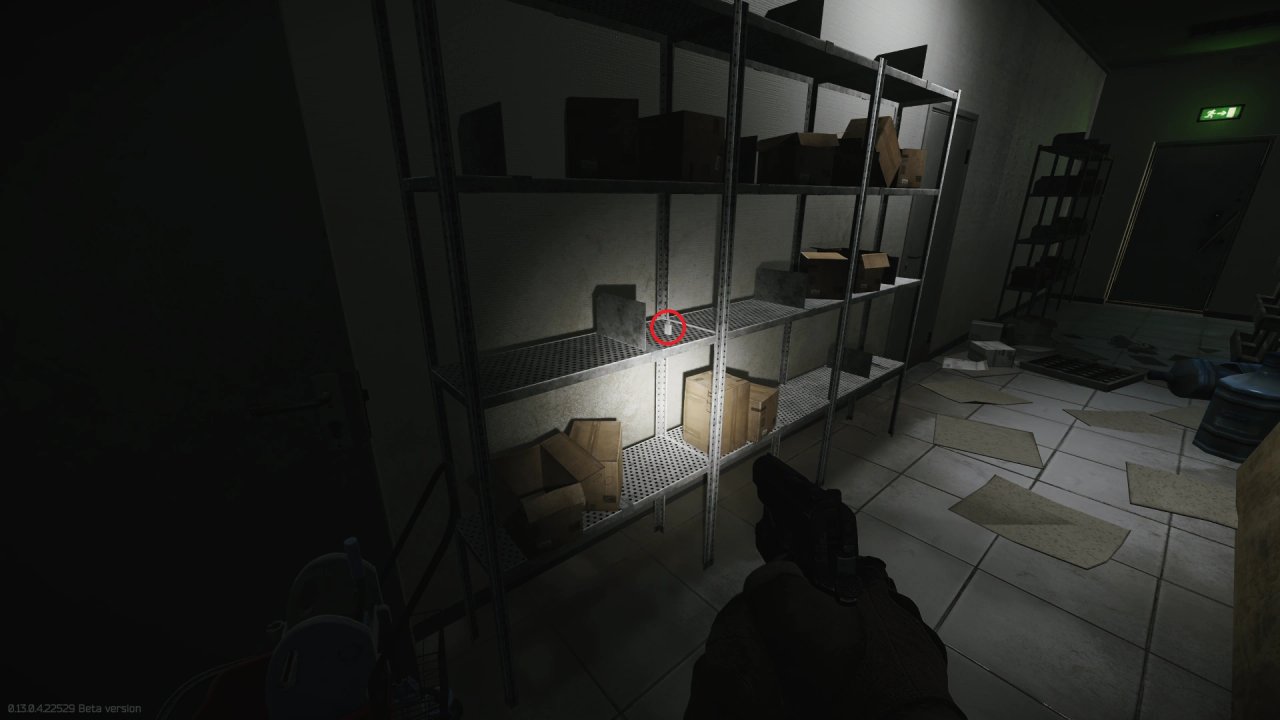
- 外の階段と西側の2階オフィスをつなぐ通路にある金属棚。
- 東側の人員棟の北側にあるオフィス内の回転テーブル。
- 北東の小屋(Northeastern shack): 屋根にタープがかかっている北東の電気操作用小屋の金属棚。
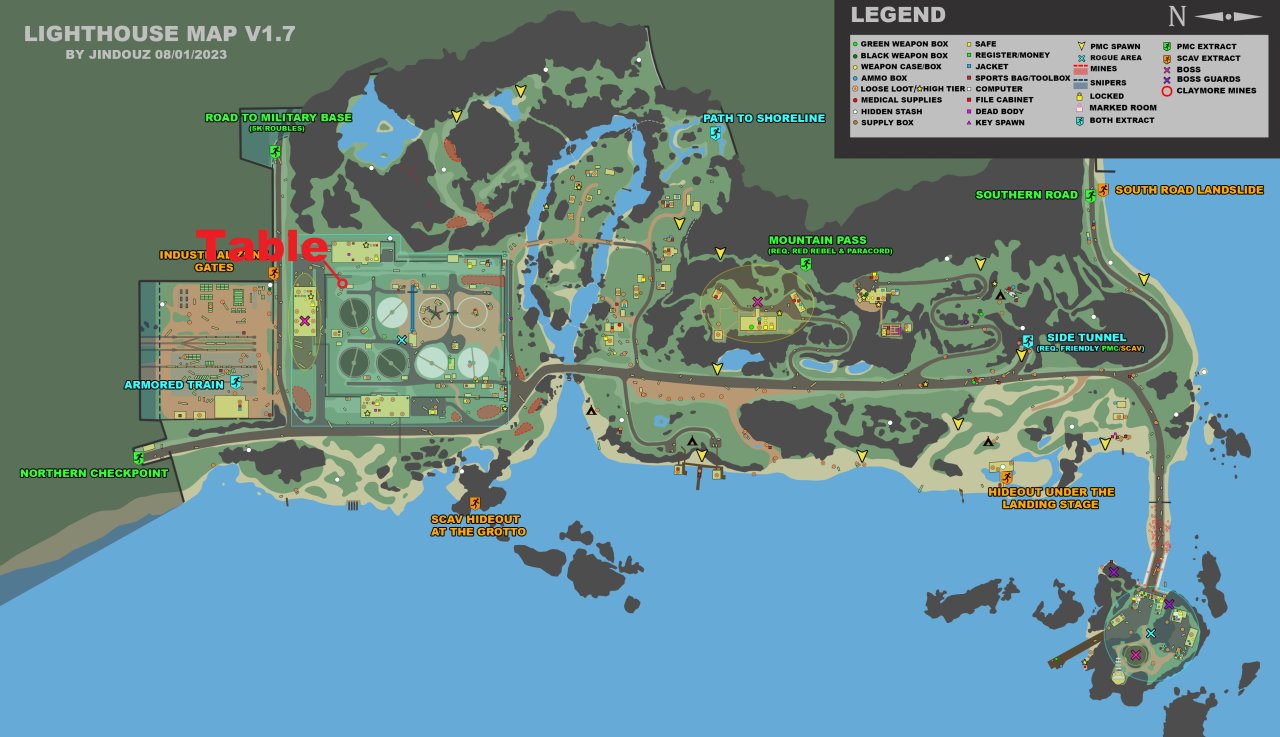
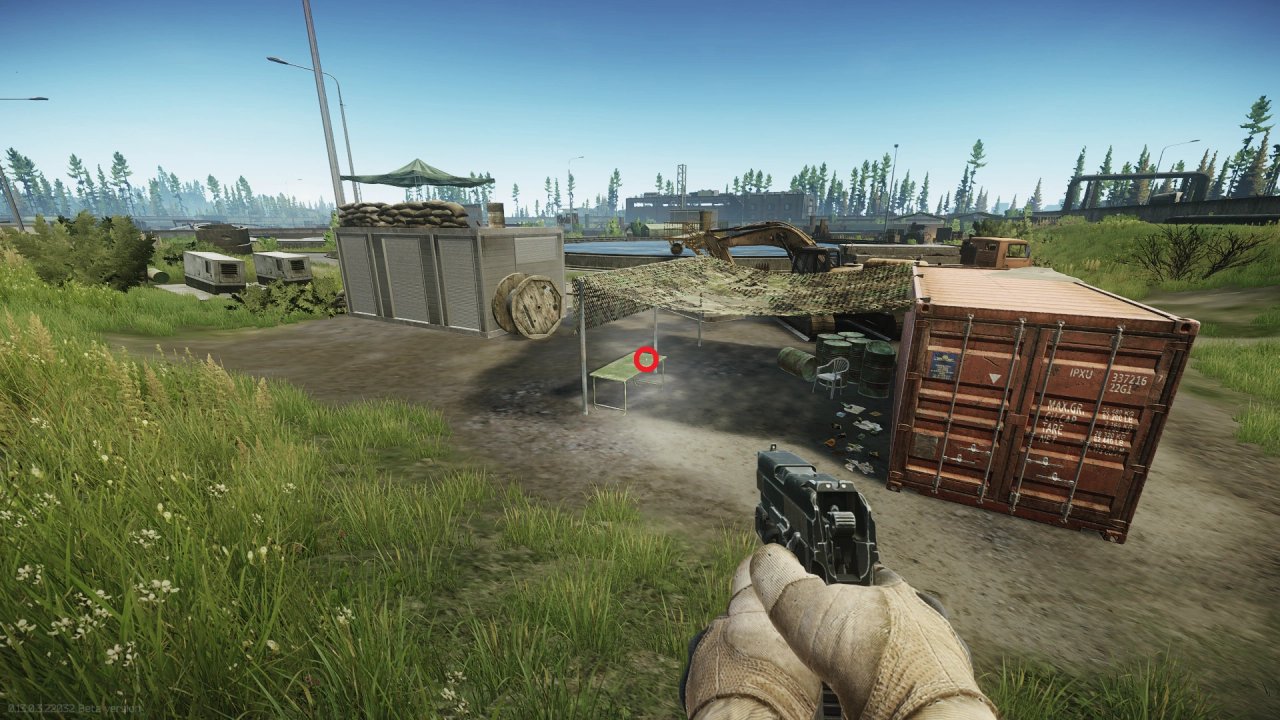
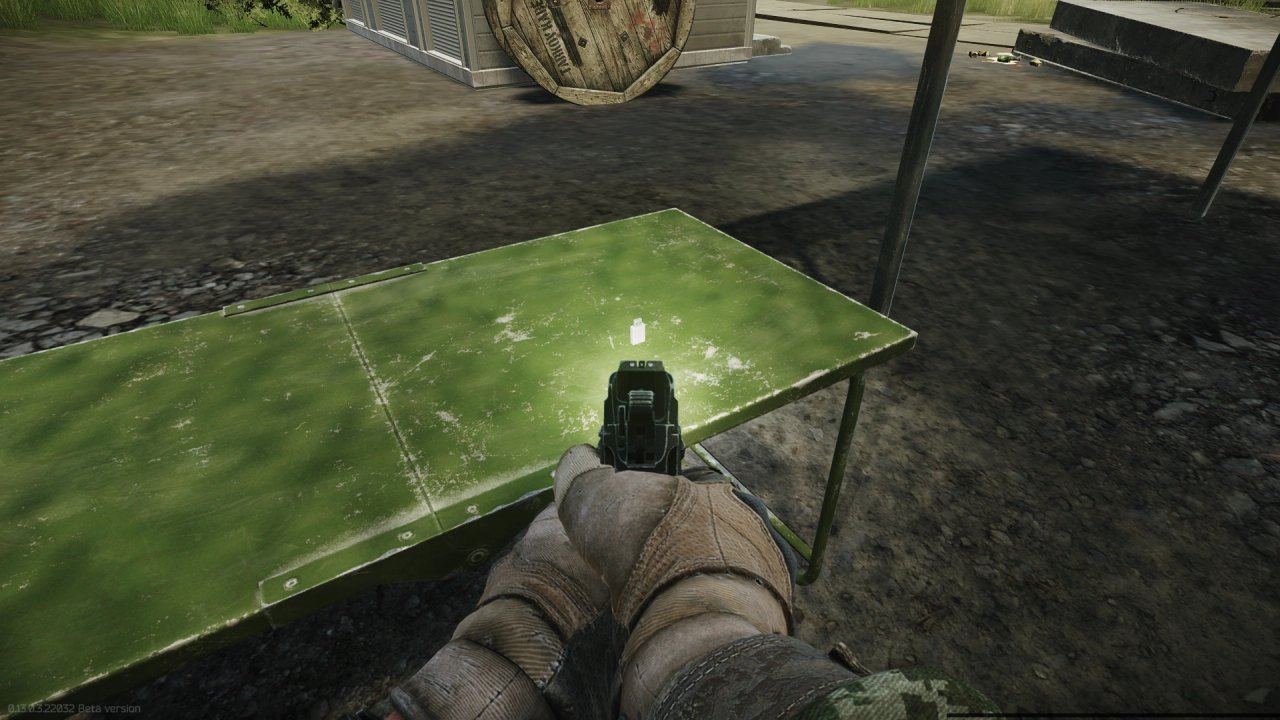
- 北東のテーブル(Northeastern table): 北東にある赤いコンテナの隣のテーブル。
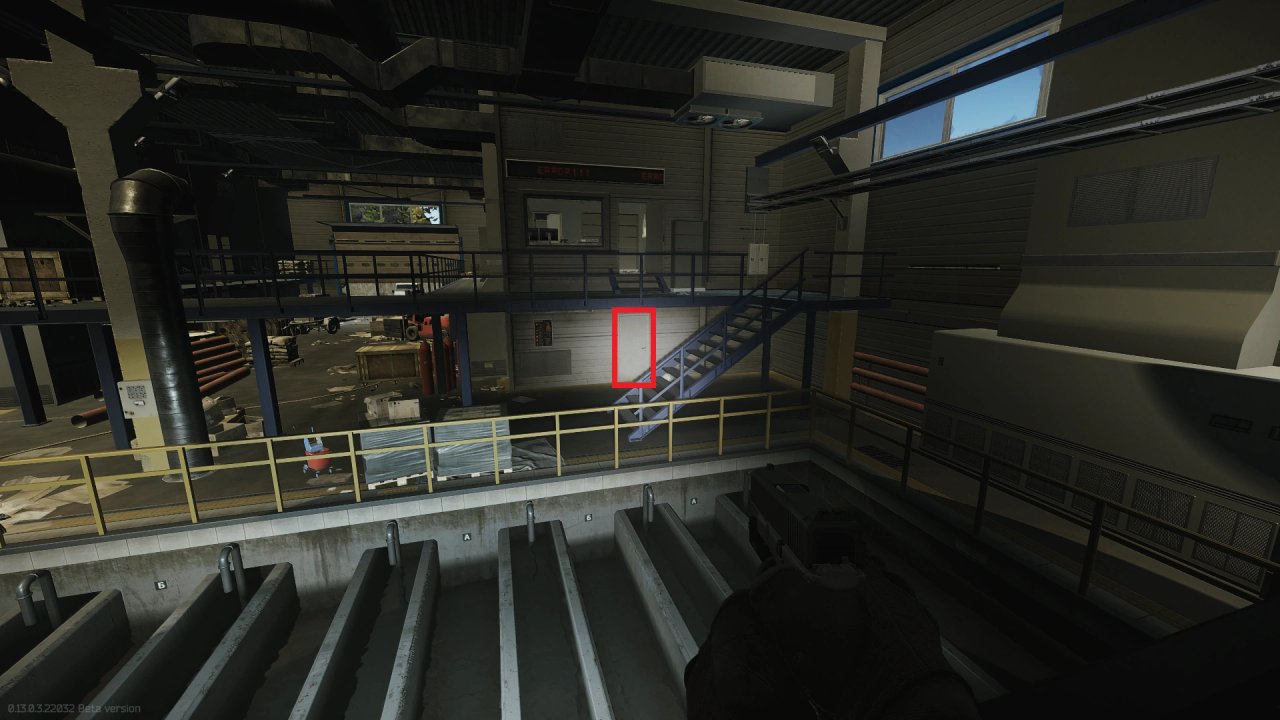
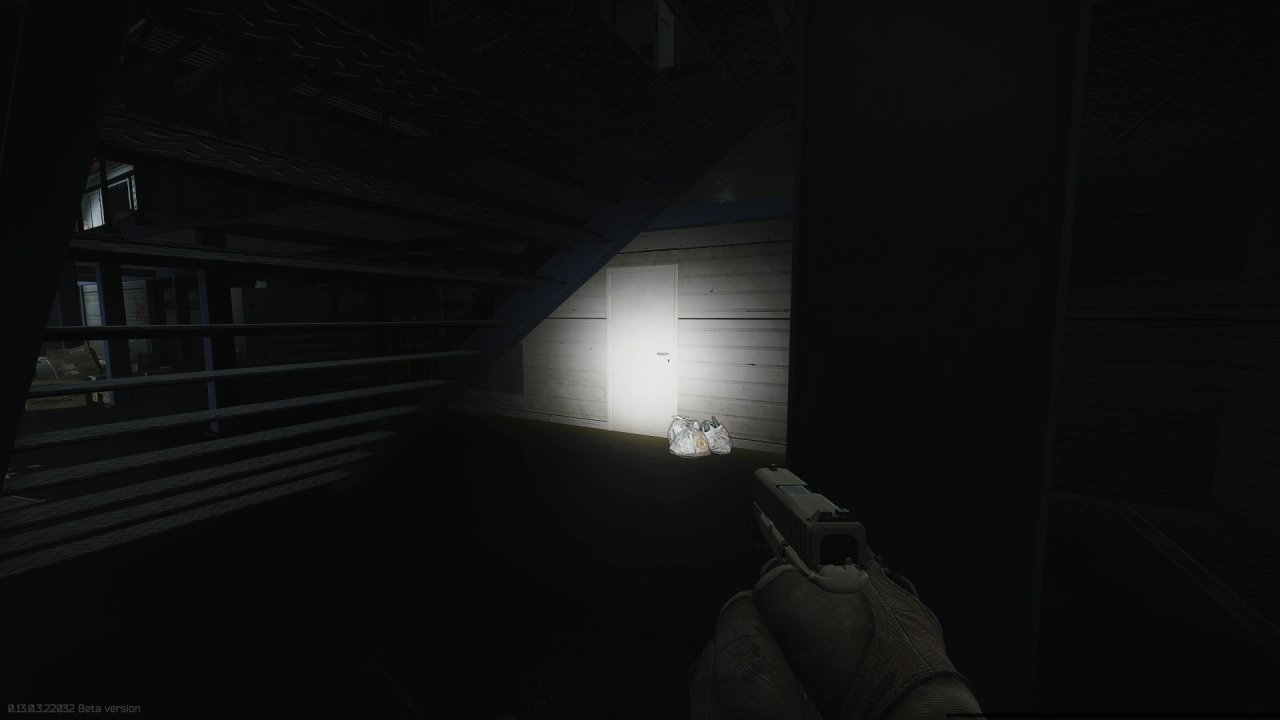
- Building #2:
- 水処理施設(Water treatment plant)の保管部屋にある金属棚の下段。
- 南東の2階オフィスのいずれかの棚。
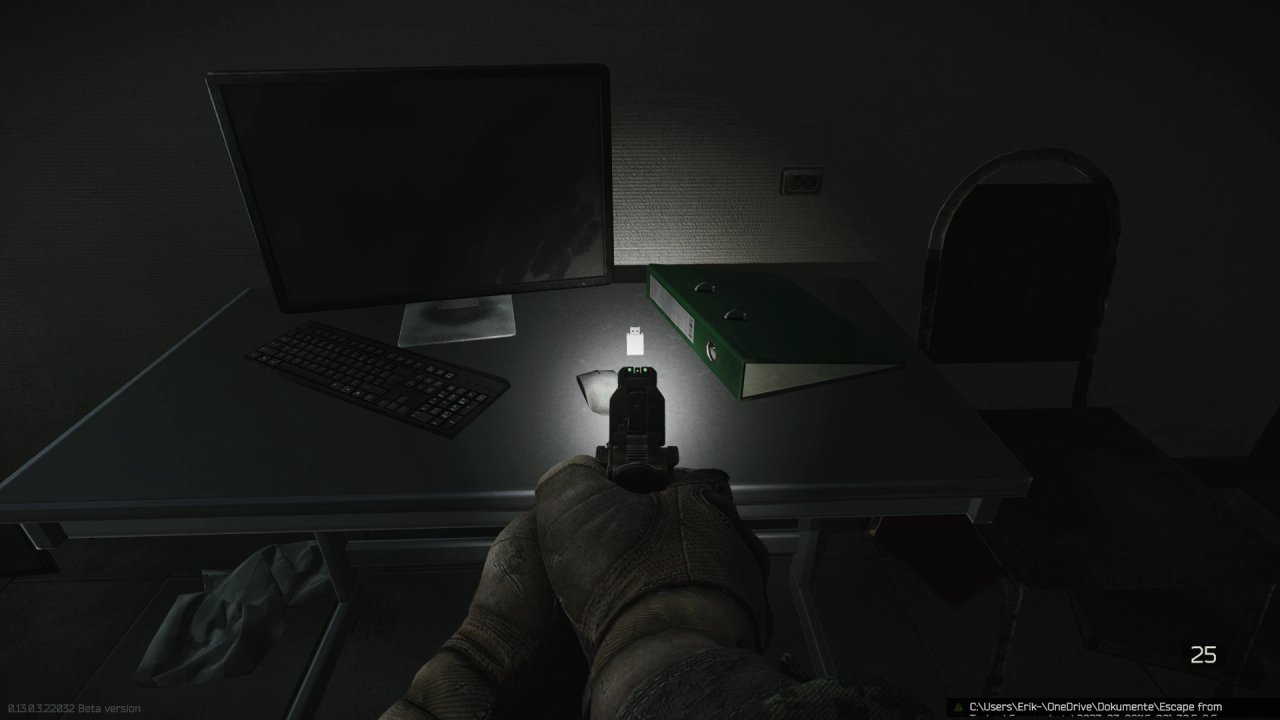
- 西側のオフィスのデスク。
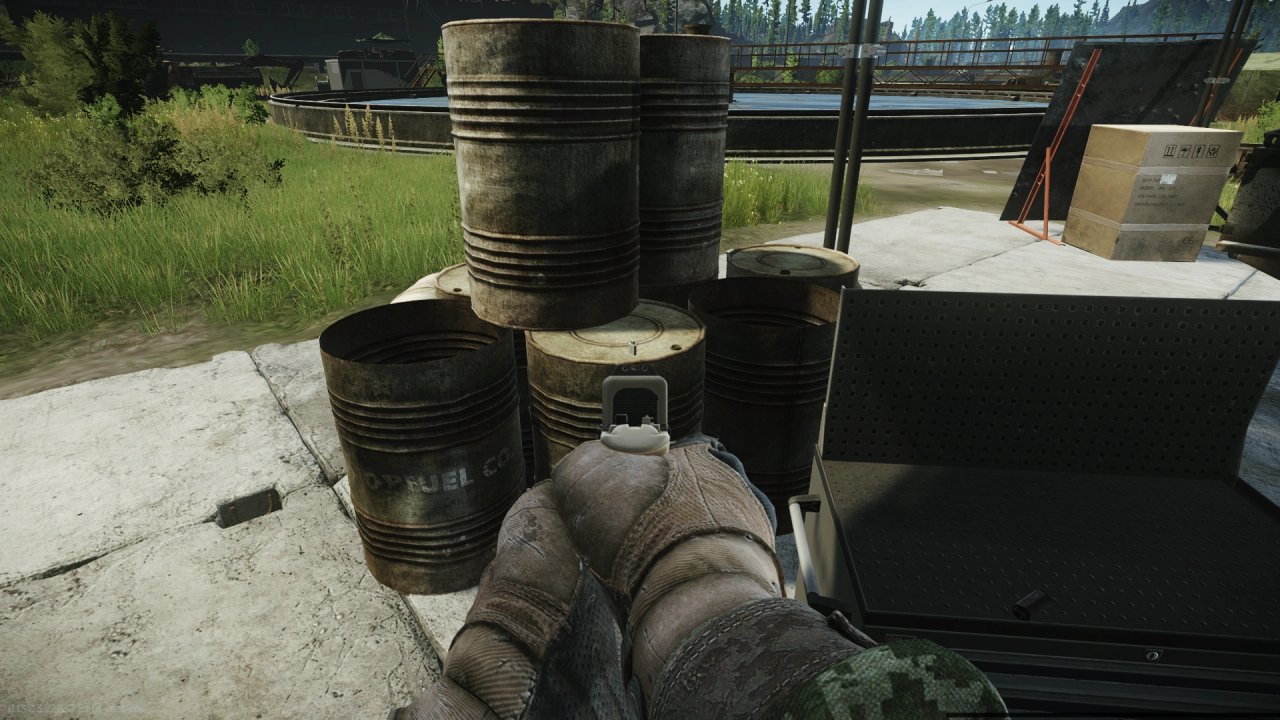
- 北の車両テント(Northern vehicle tent): BRDMとピックアップトラックがある北のテント内の、テーブルまたはドラム缶。
- 北のテント(Northern tent): 緑の木製箱の隣にあるテーブル。
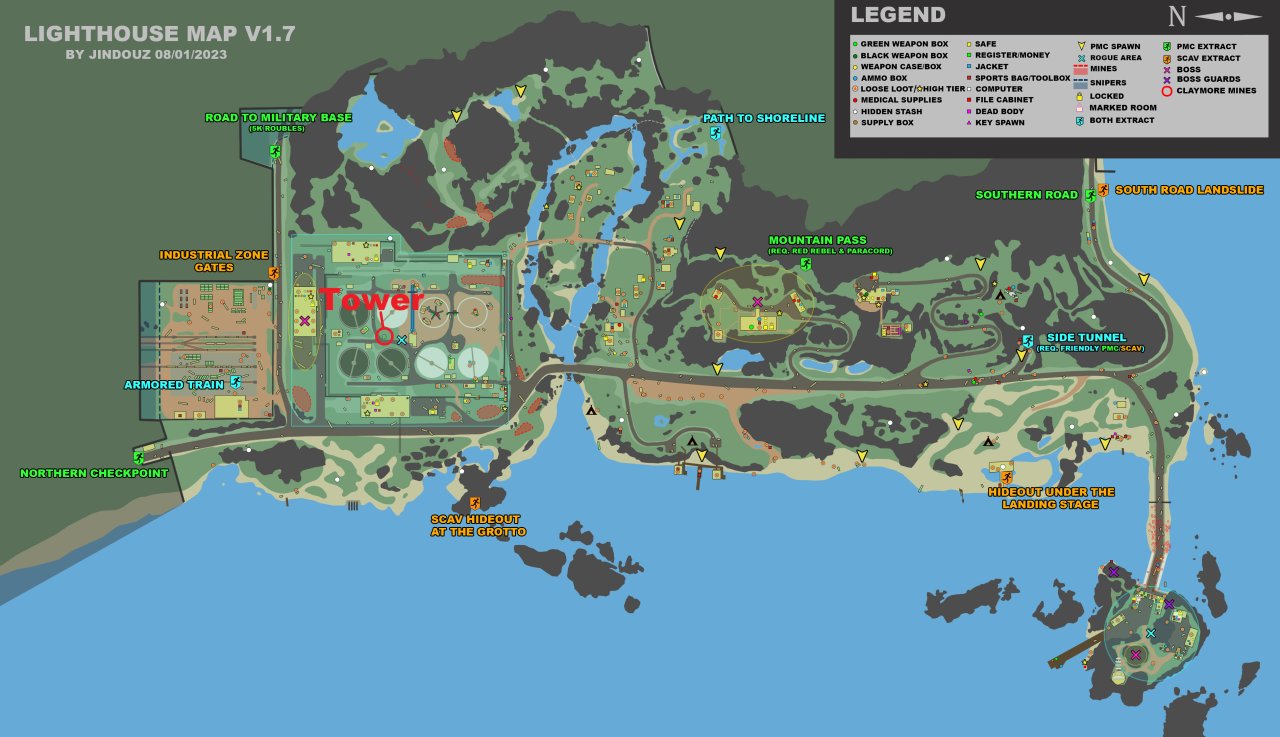
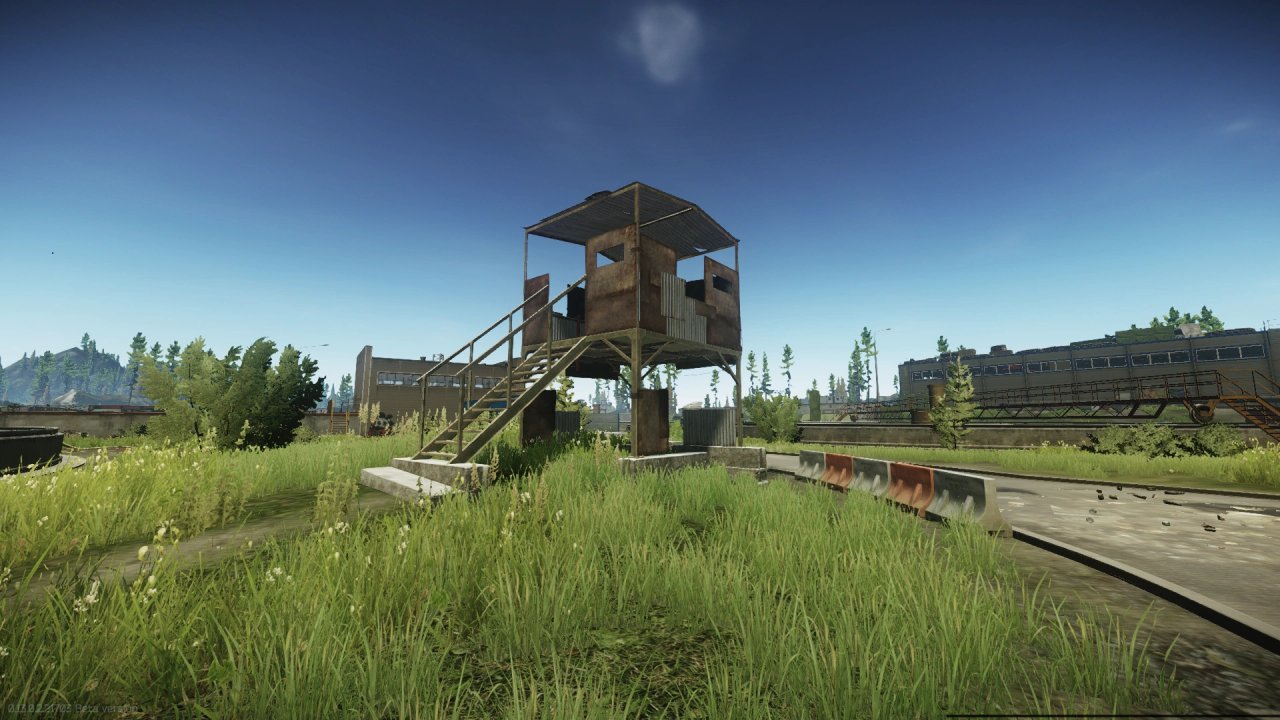
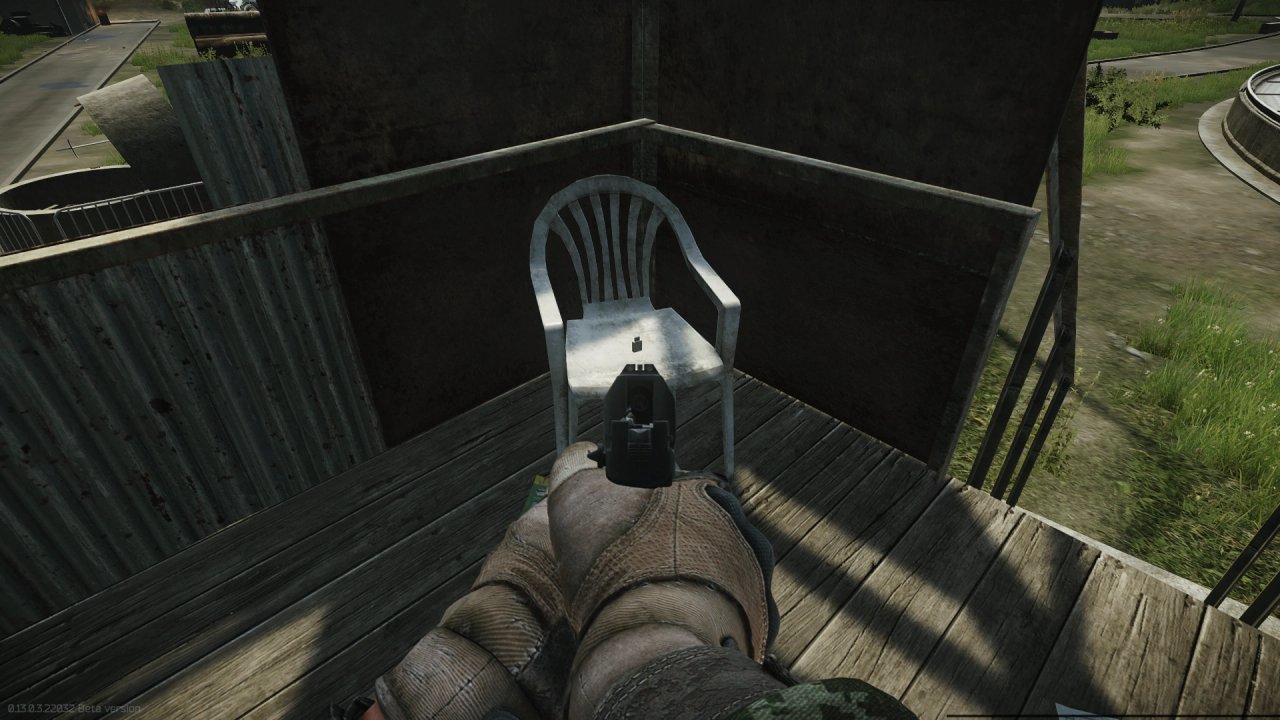
- 北の小さな監視塔(Northern small watchtower): 小さな北の監視塔の椅子の上。
- Building #1:
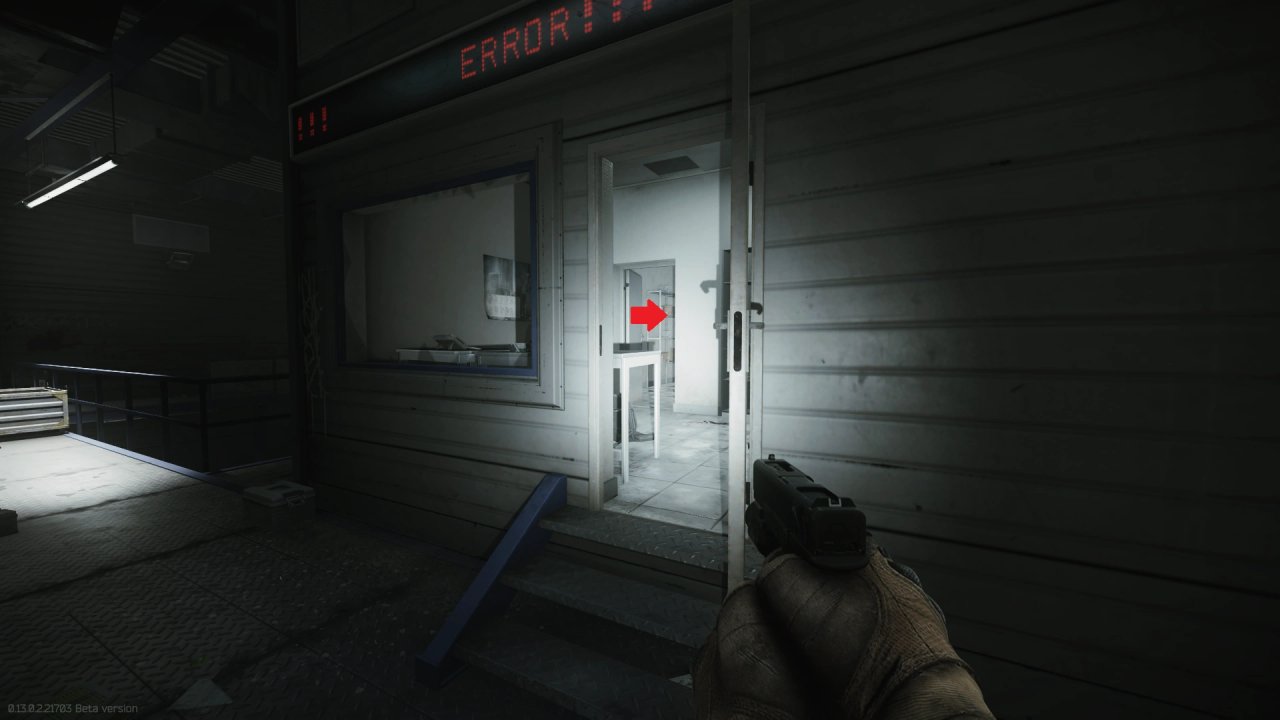
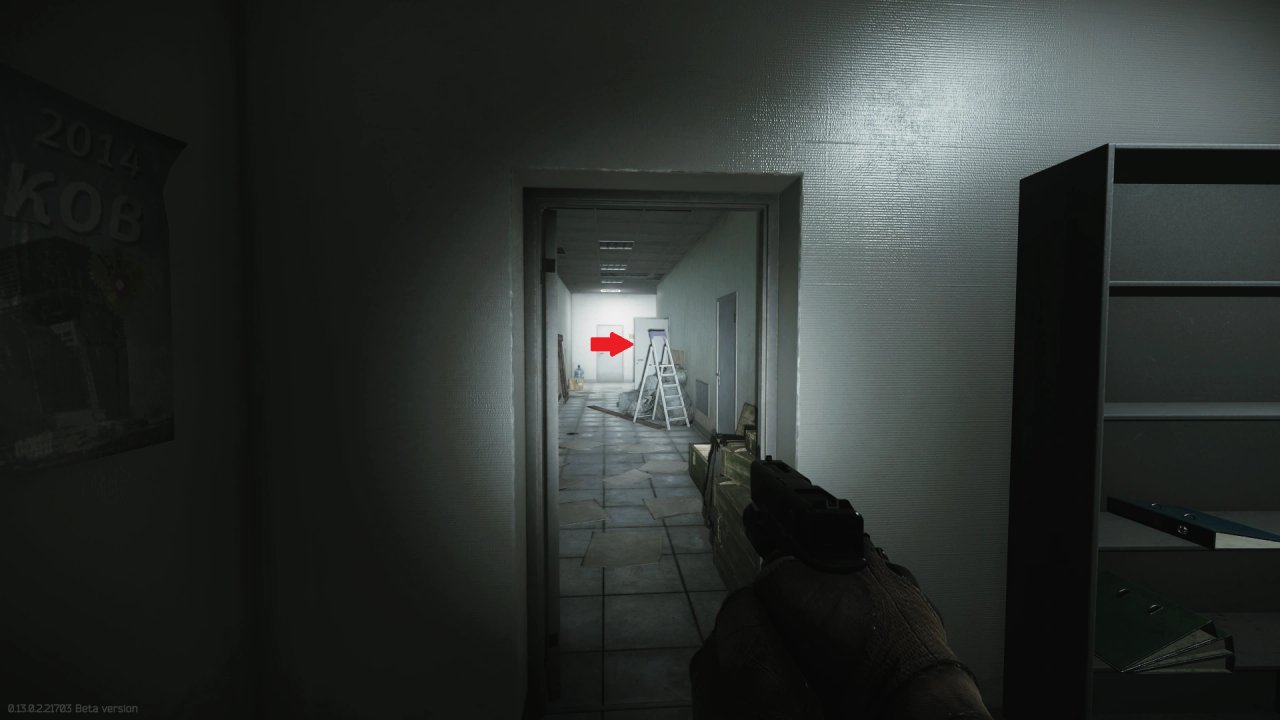
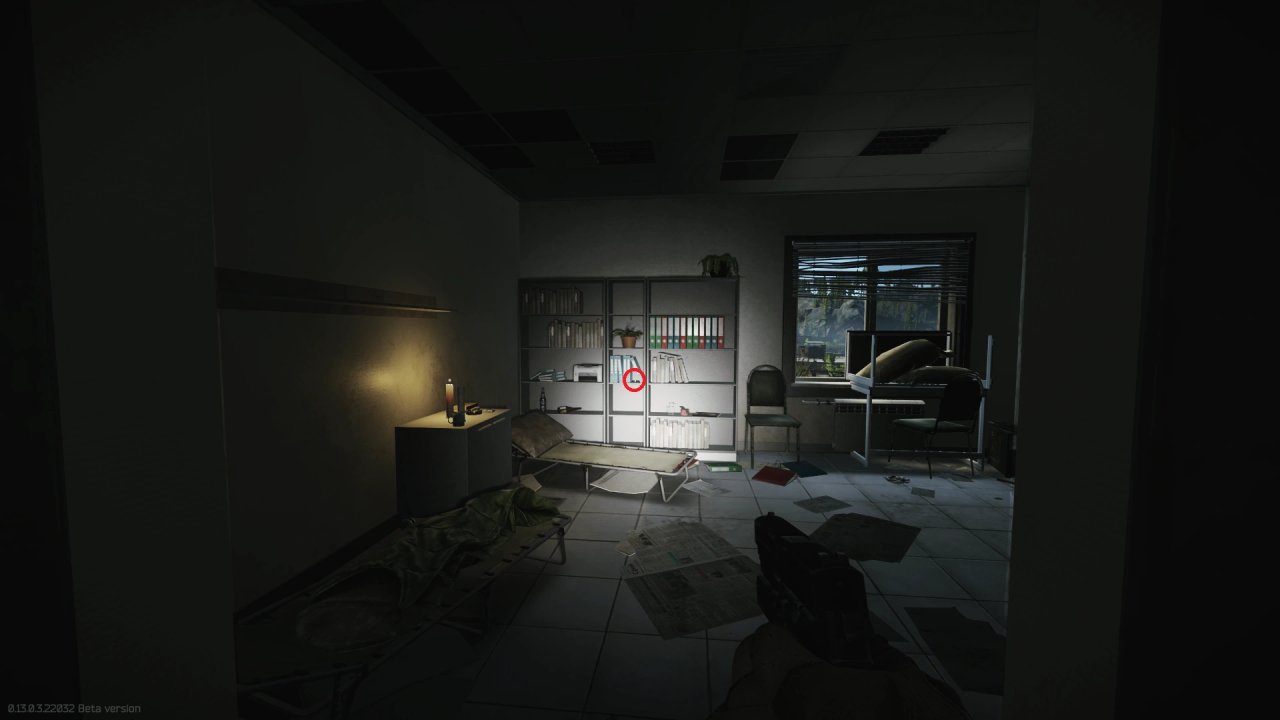
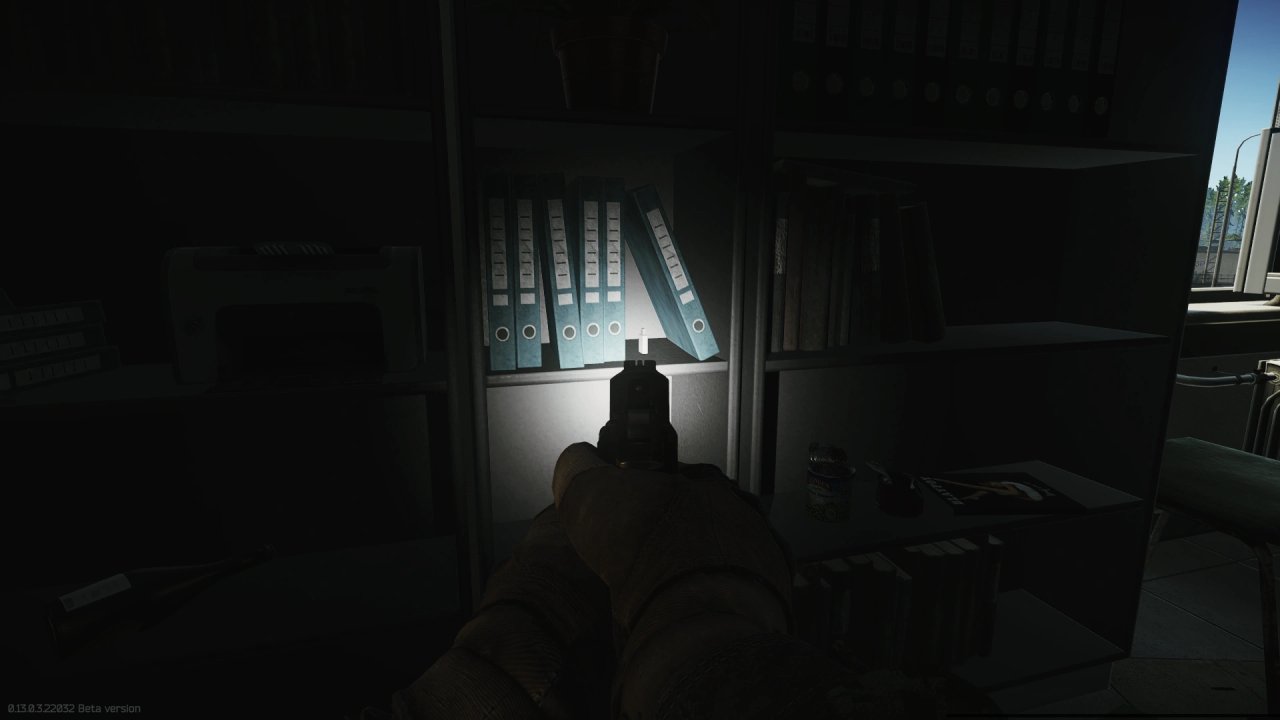
- 北東の2階オフィスのいずれかの棚またはデスク。
- 西側の人員棟の廊下にある金属棚。
- 西の小屋(Western shack): 西の電気操作用小屋の金属棚。
2. 無線送信機の再フラッシュ(Reflashing)
フラッシュドライブを入手した後、Hideout(隠れ家)のIntelligence Center(情報センター)レベル2にあるRadio transmitter(無線送信機)を再フラッシュする必要があります。
【重要】 再フラッシュのプロセス中は、常に電力が供給されている必要があります。 電力が途切れるとプロセスが中断されます。
3. 橋の通過と灯台の訪問
再フラッシュが完了すると、無線送信機が完全に機能するようになります。これにより、Zryachiy(ズリャチ)や地雷(Claymores)の監視がある橋を通り抜けることが可能になります。橋を渡った先にあるlighthouse building(灯台の建物)を訪れることで、クエストの最終目的を達成できます。
マップ上のContainer
Container marked on map
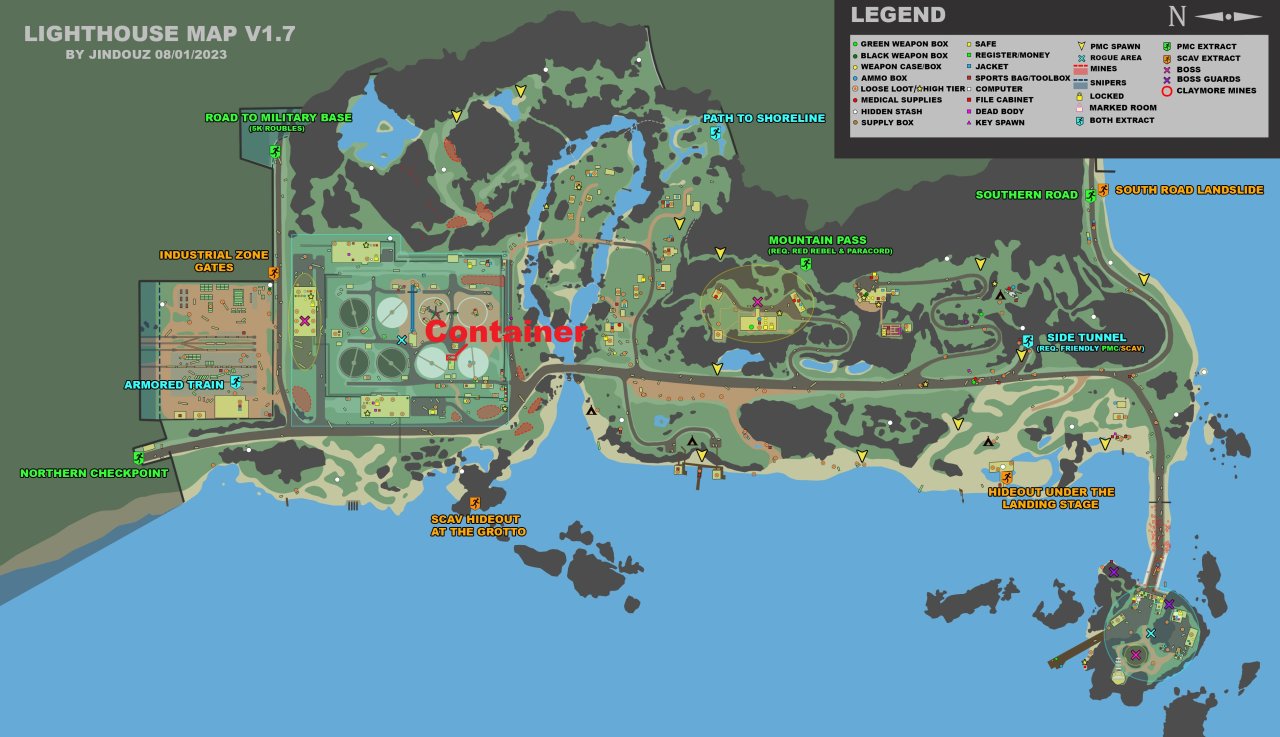
そのContainer
The container
マップ上のTower
Tower marked on map
そのTower
The tower
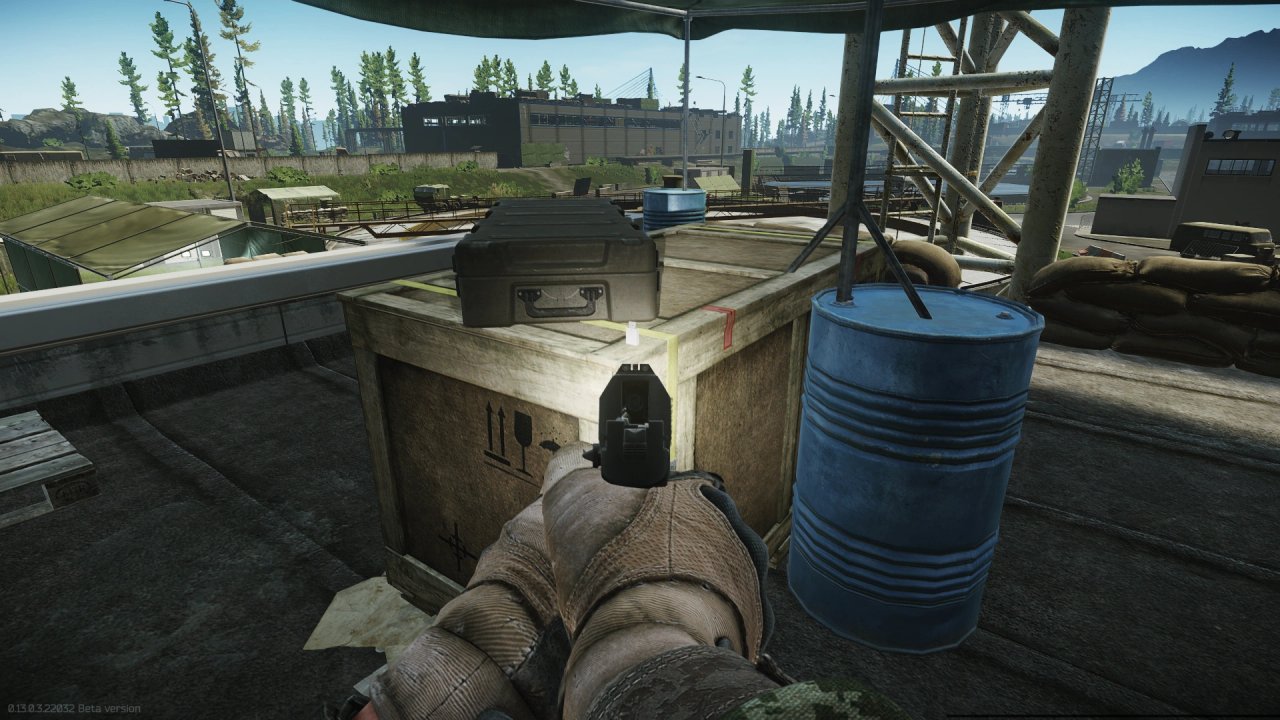
マップ上のTent
Tent marked on map
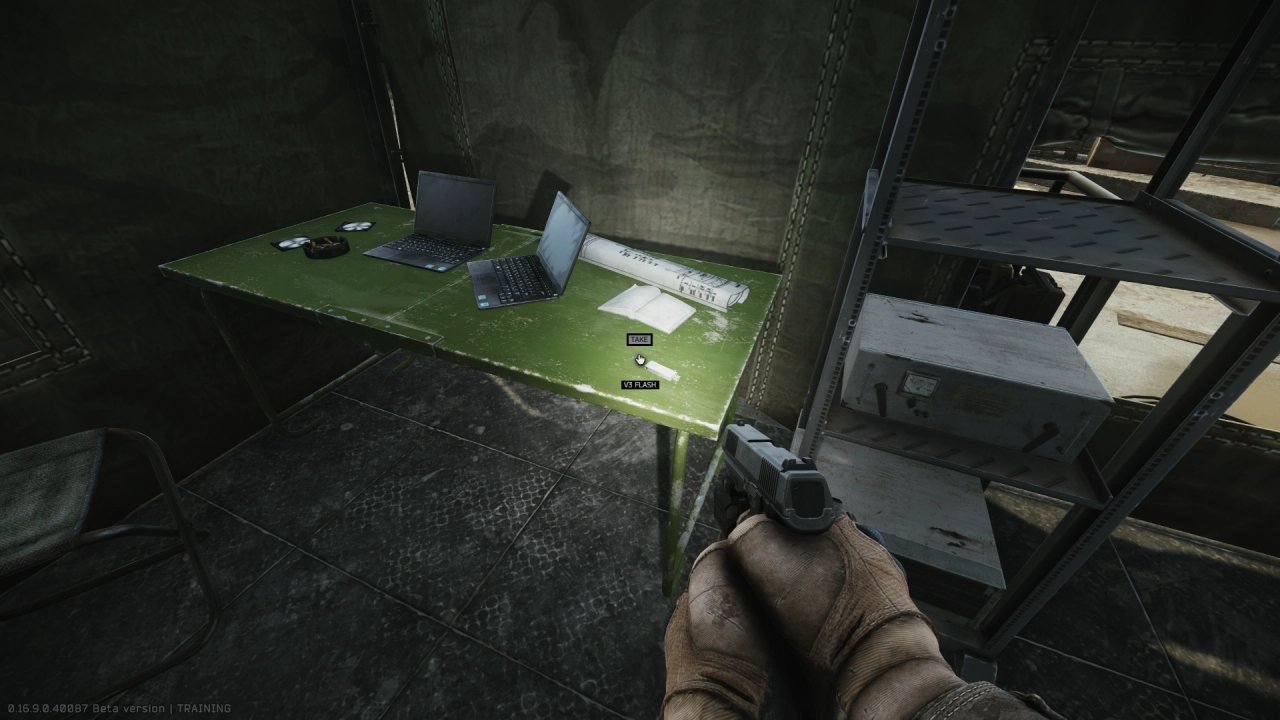
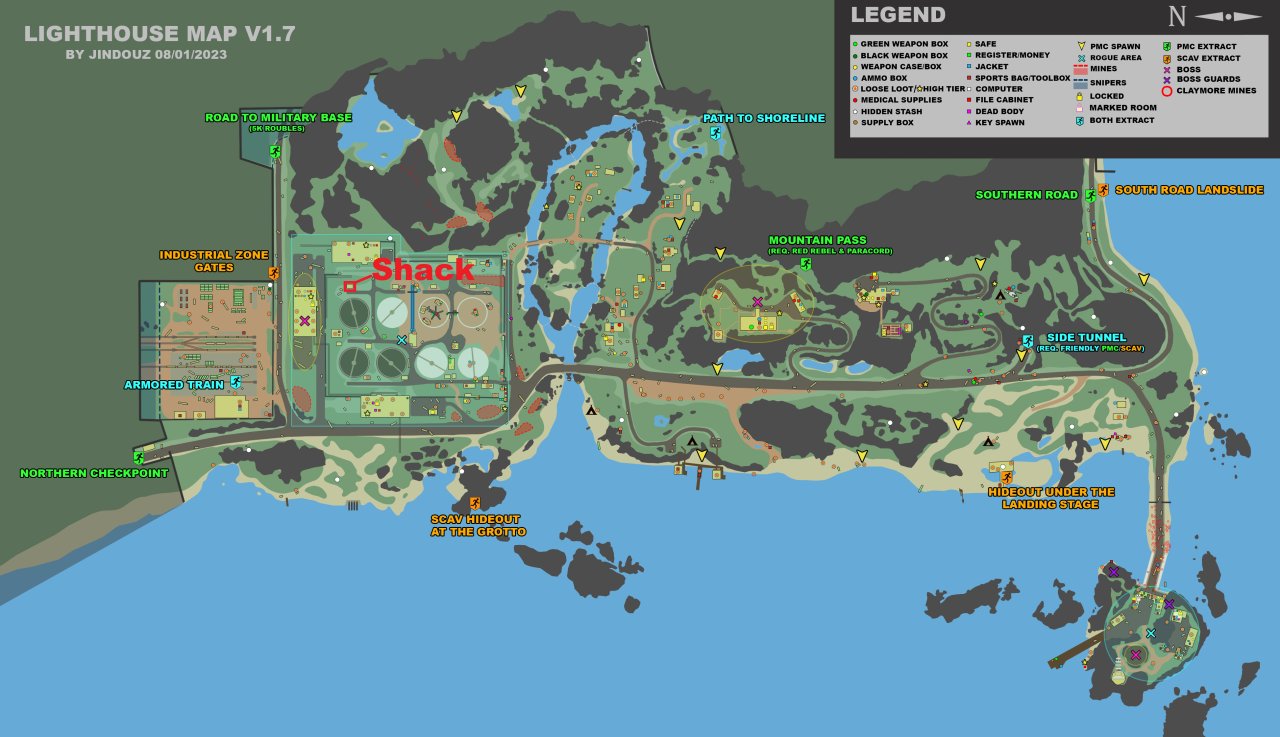
マップ上のShack
Shack marked on map
Shack
The shack
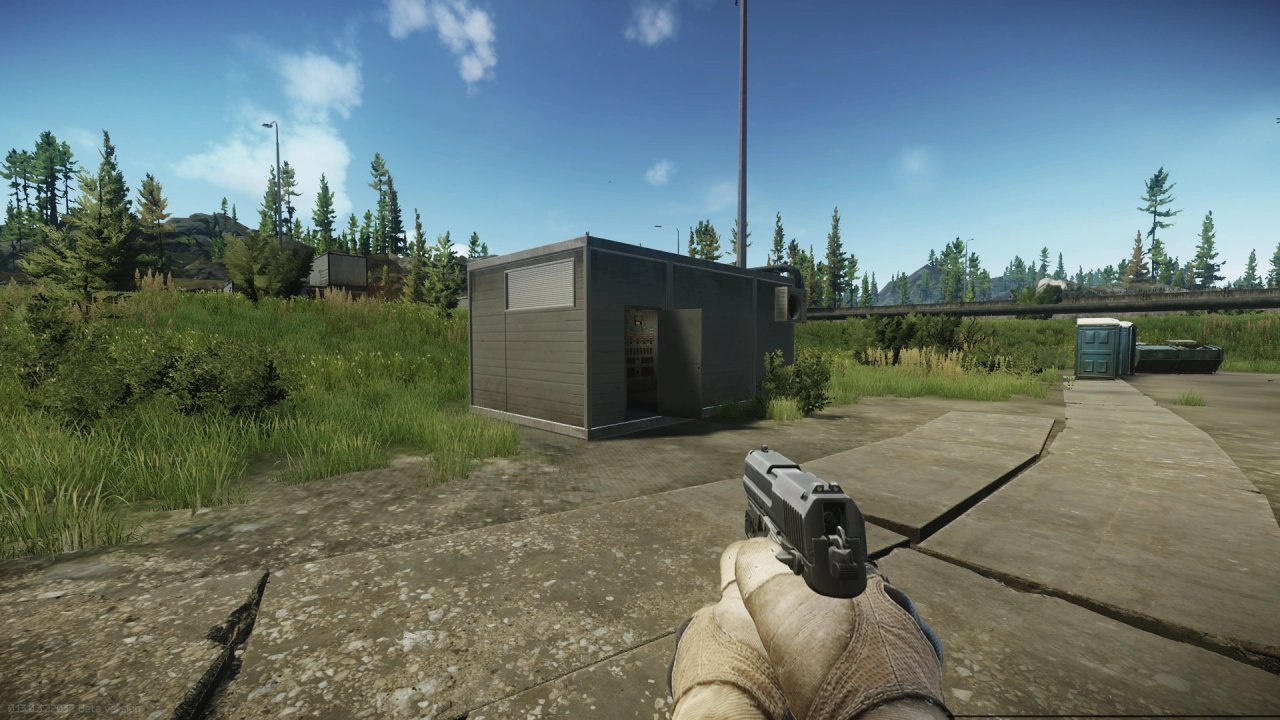
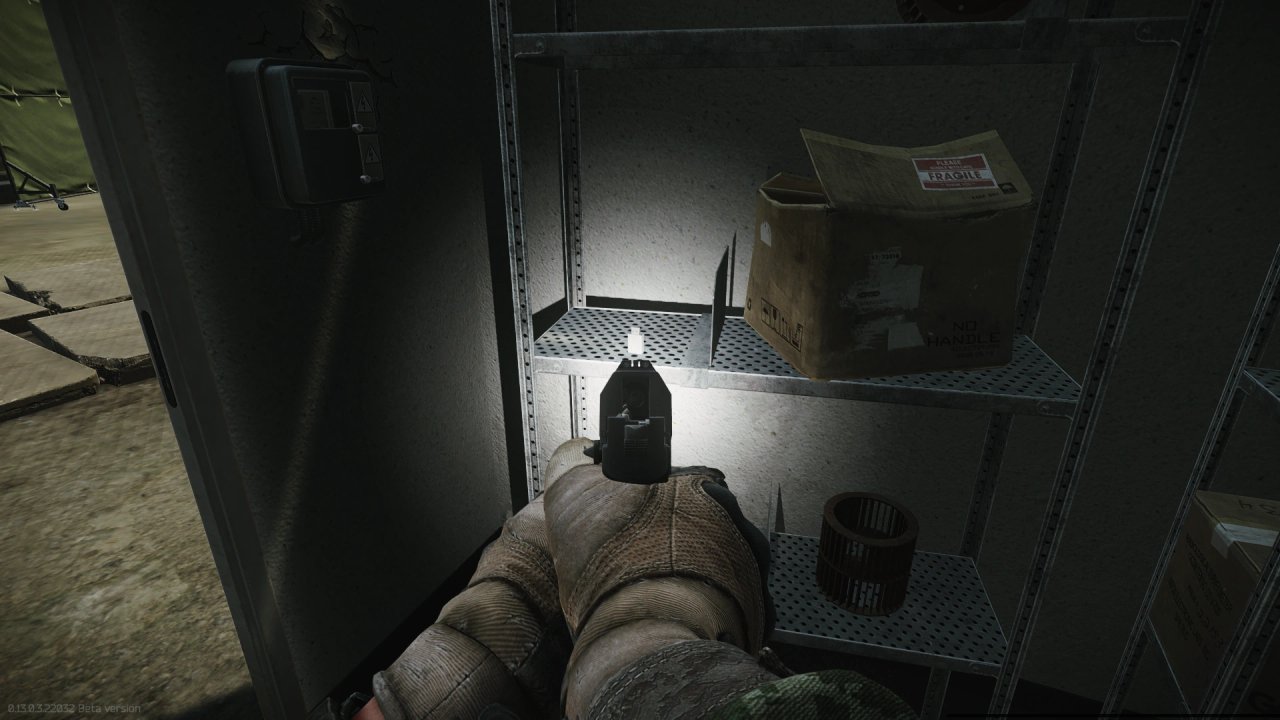
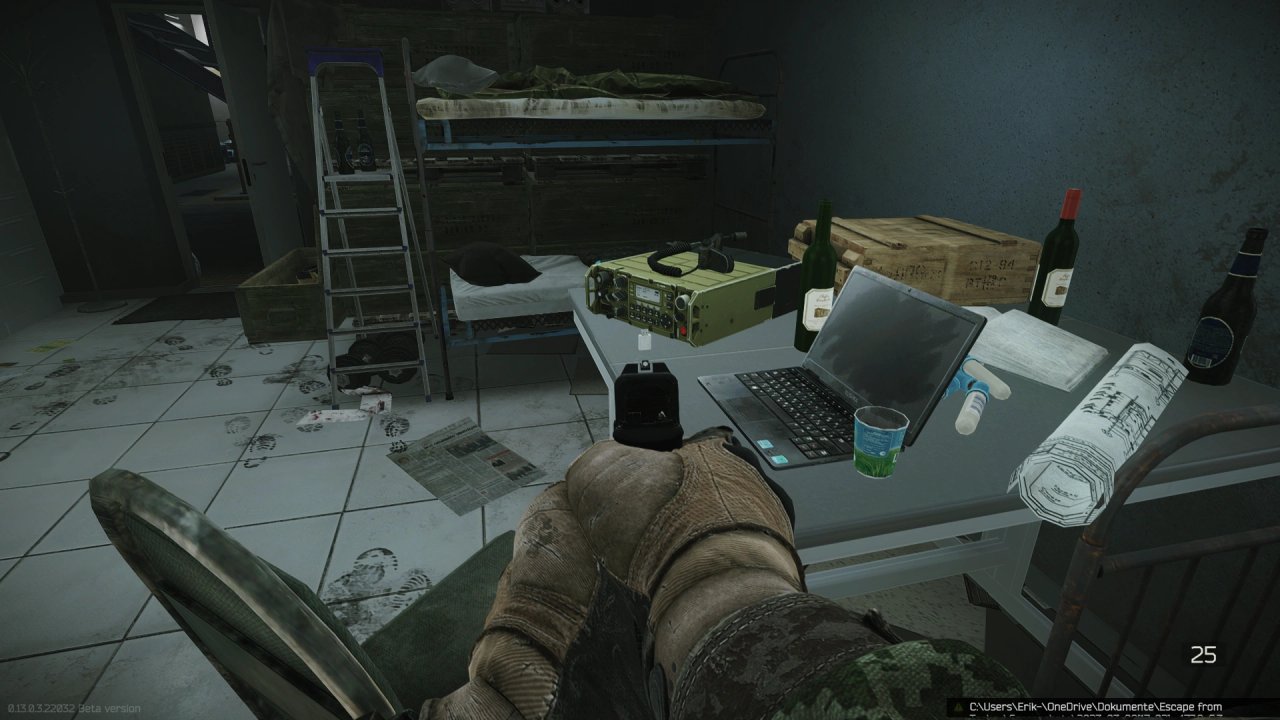
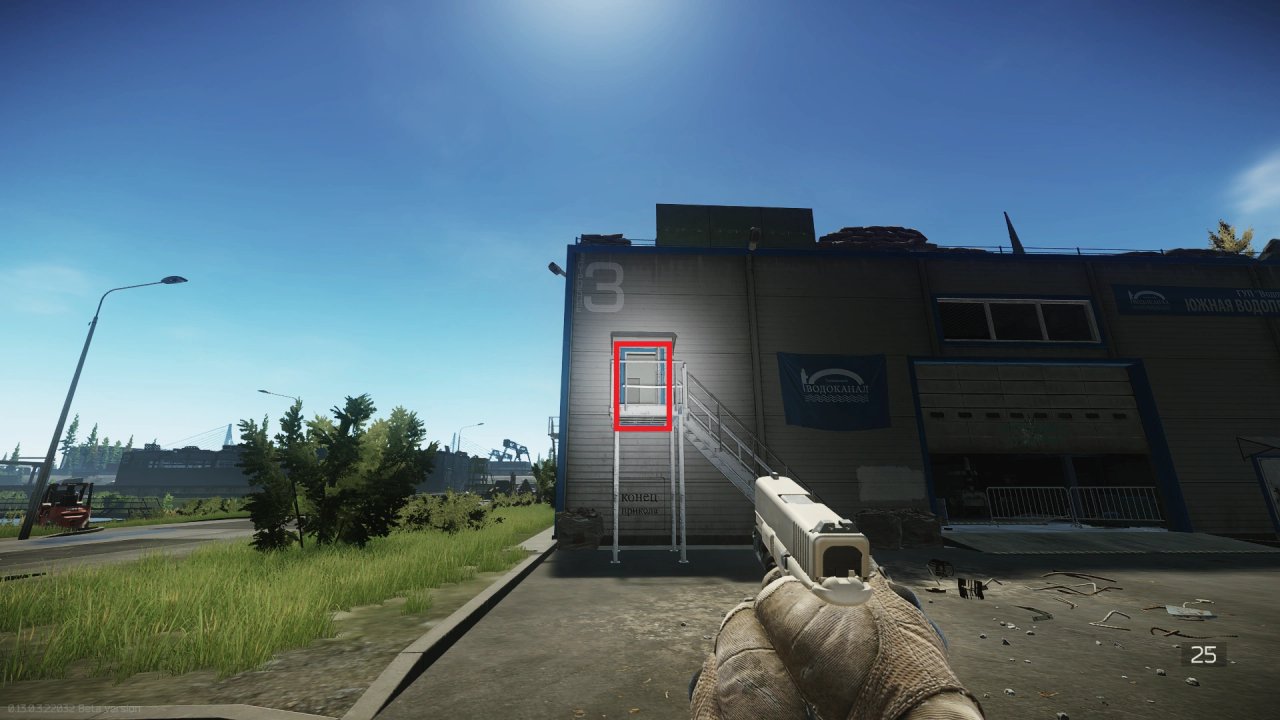
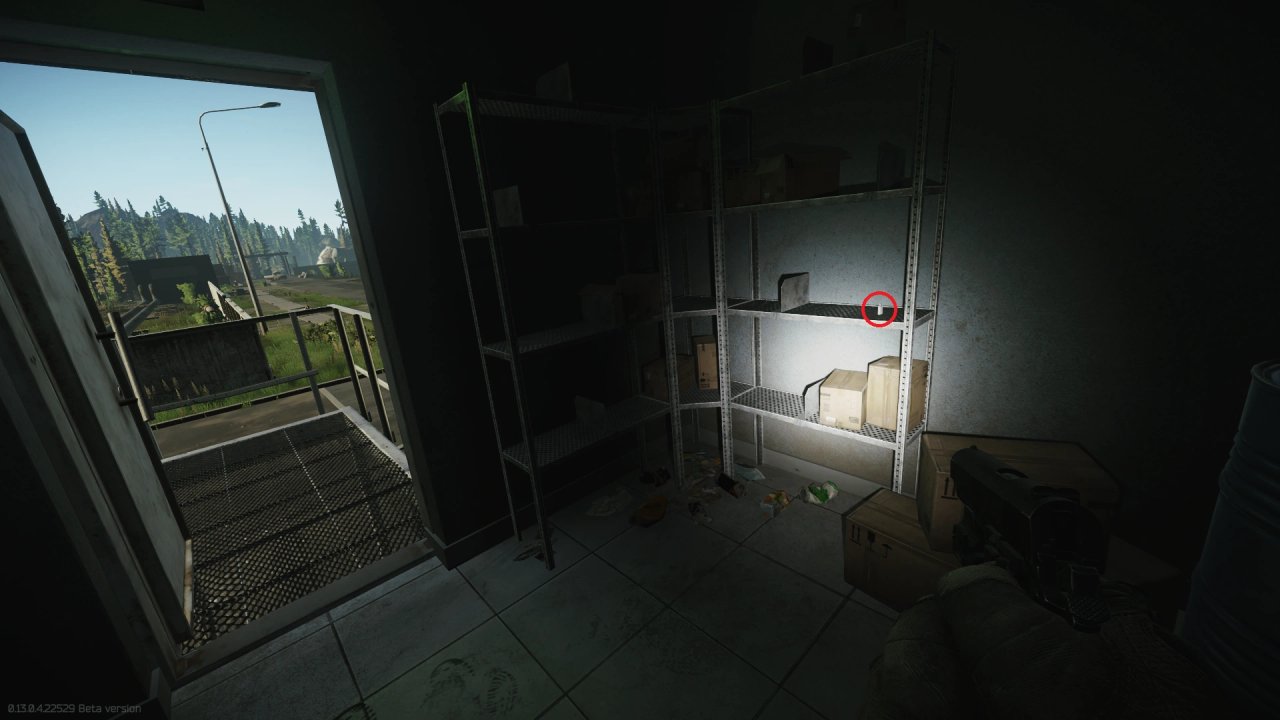
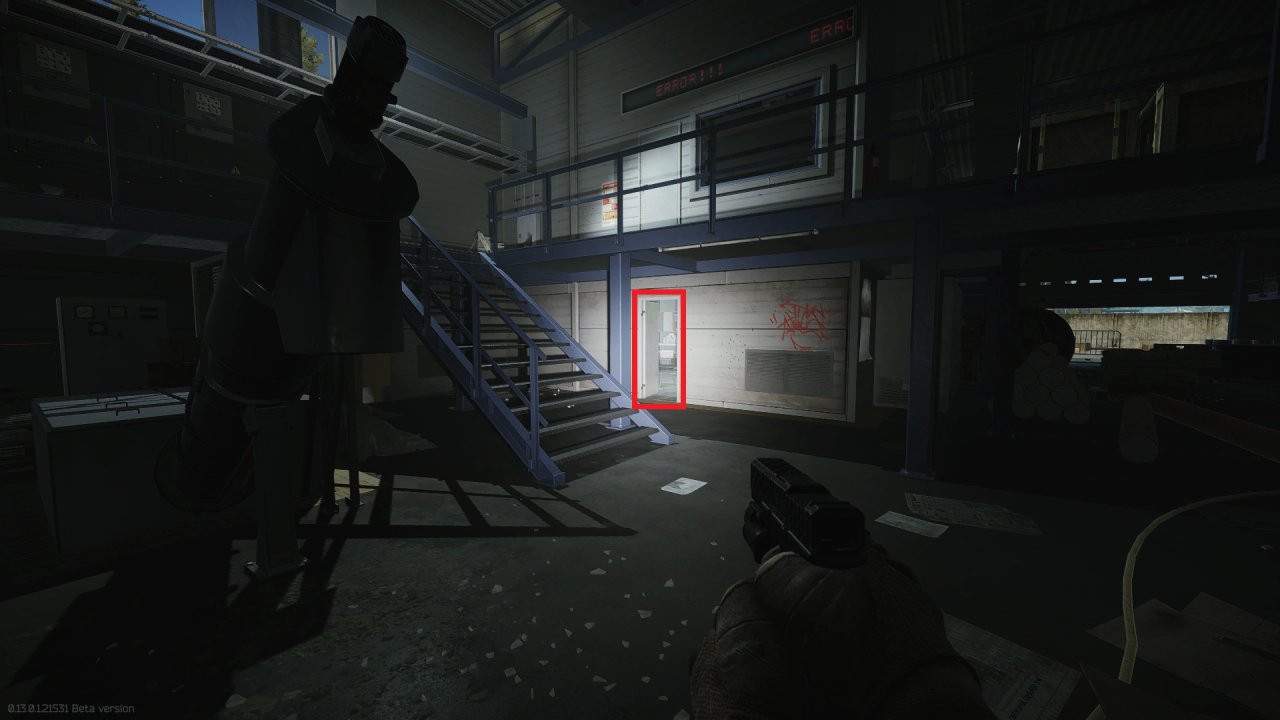
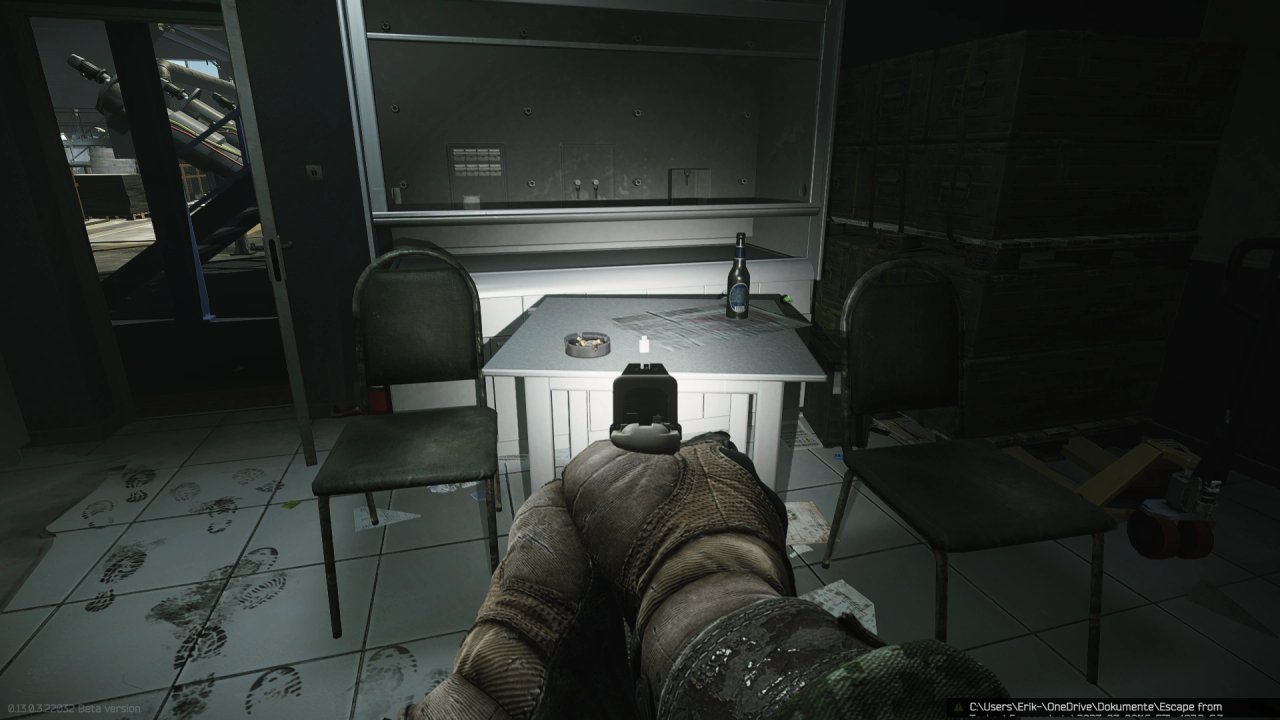
マップ上のShack
Shack marked on map
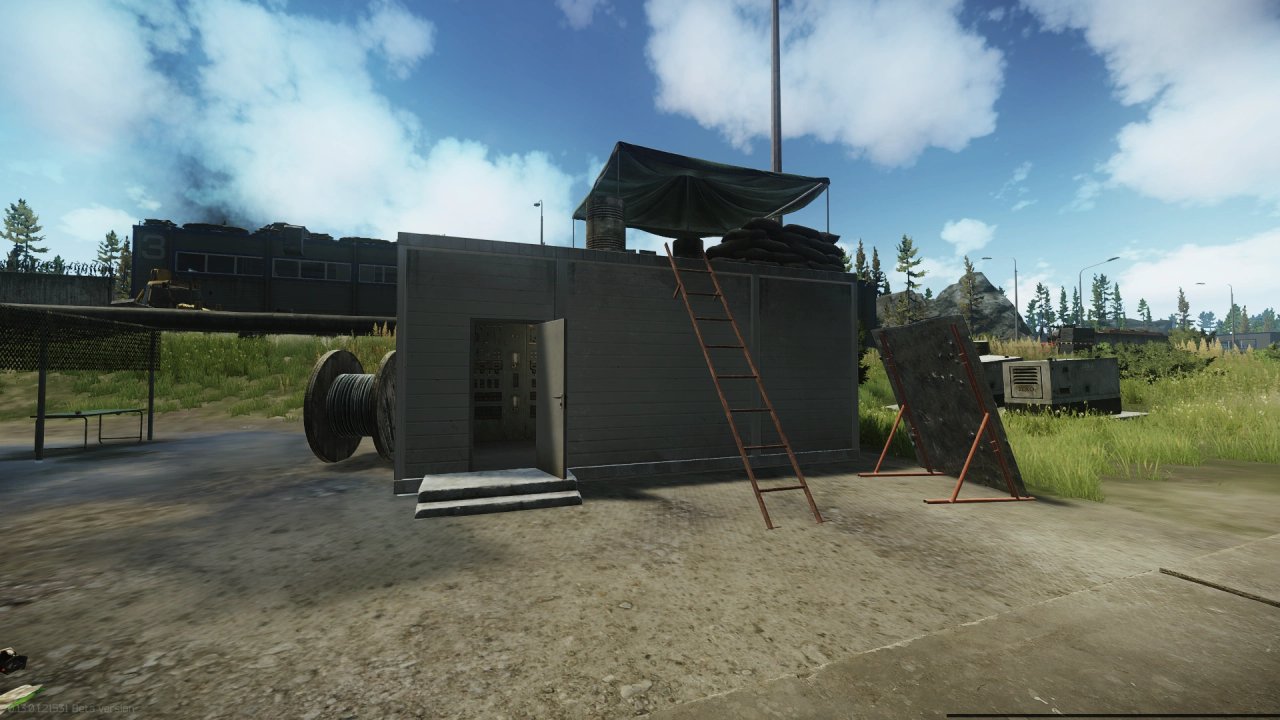
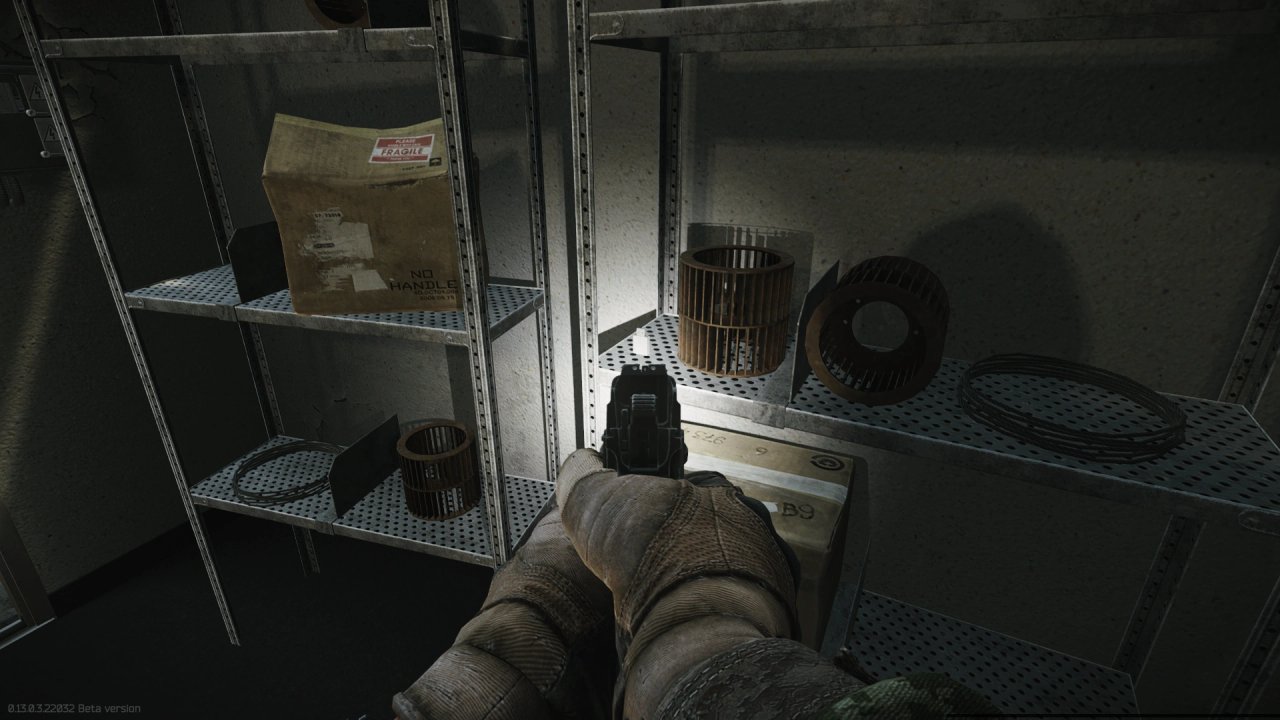
マップ上のTable
Table marked on map
そのTable
The table
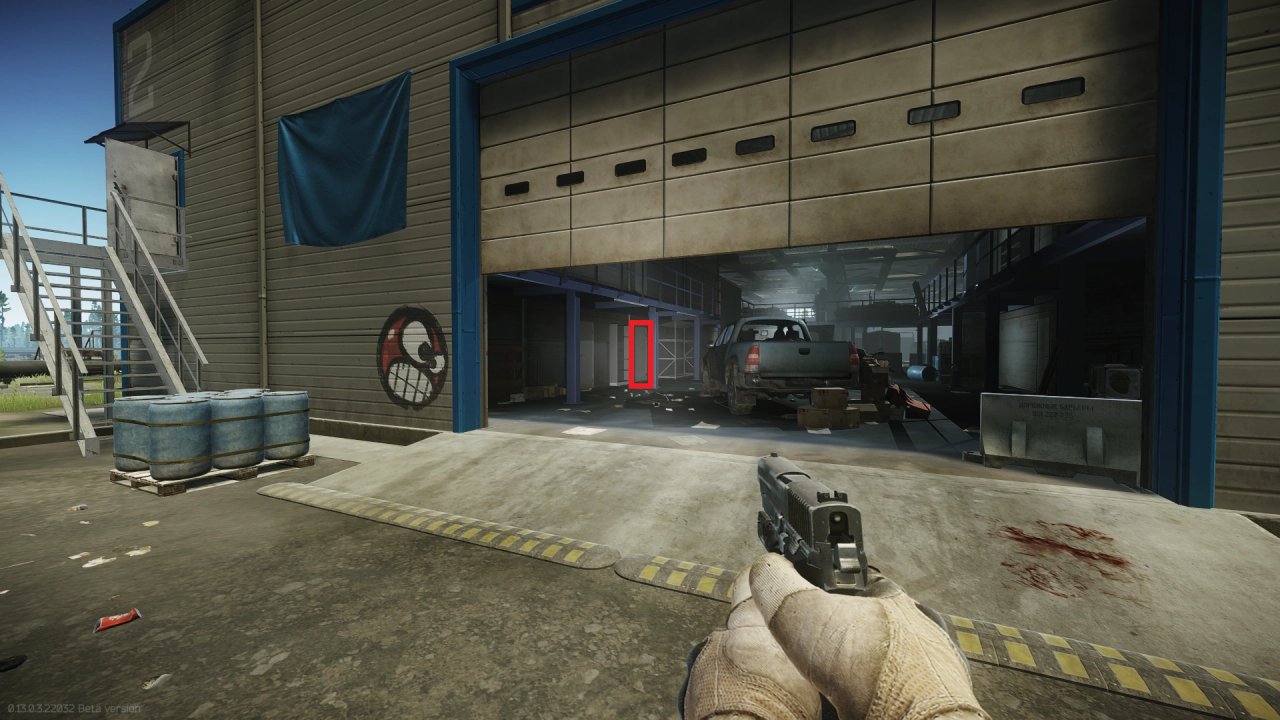
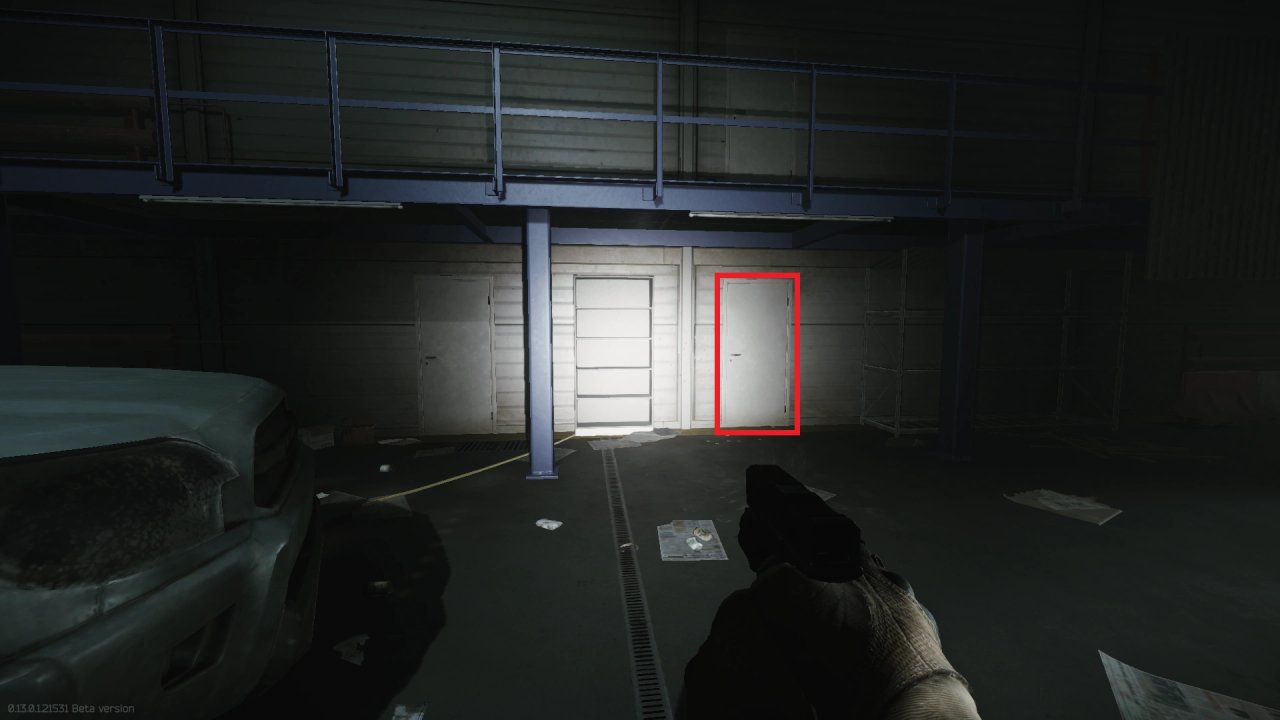
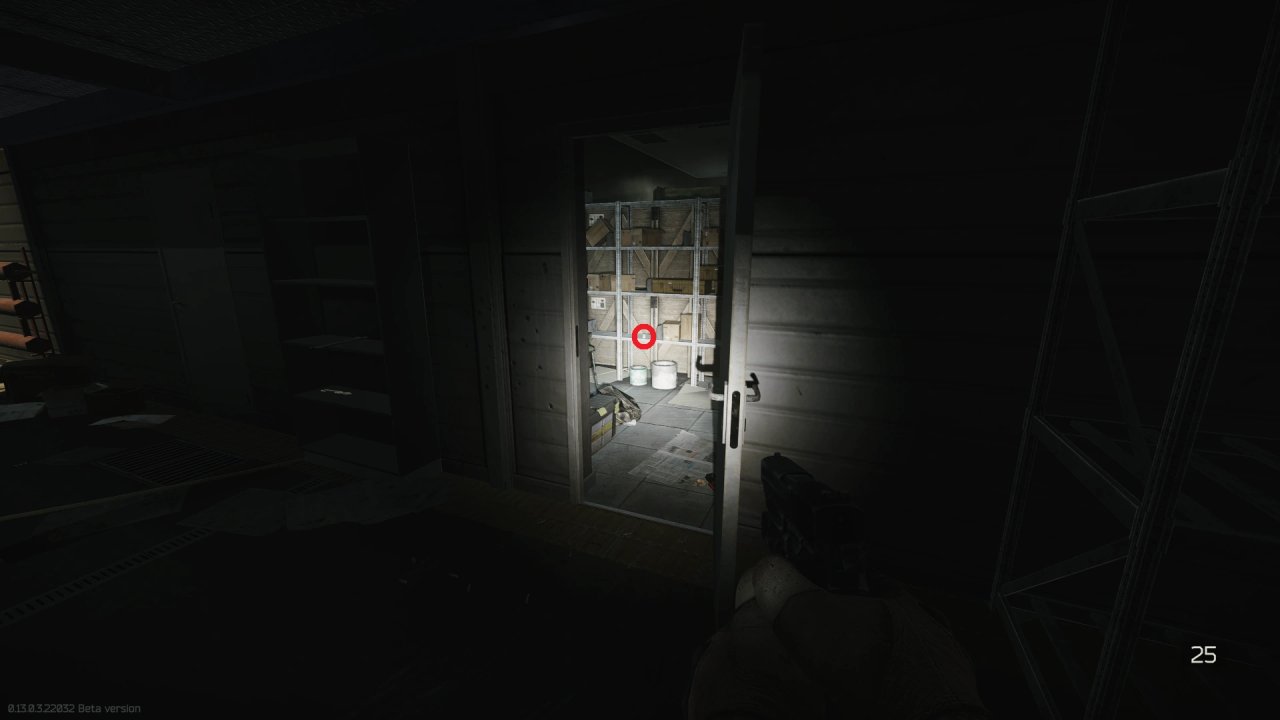
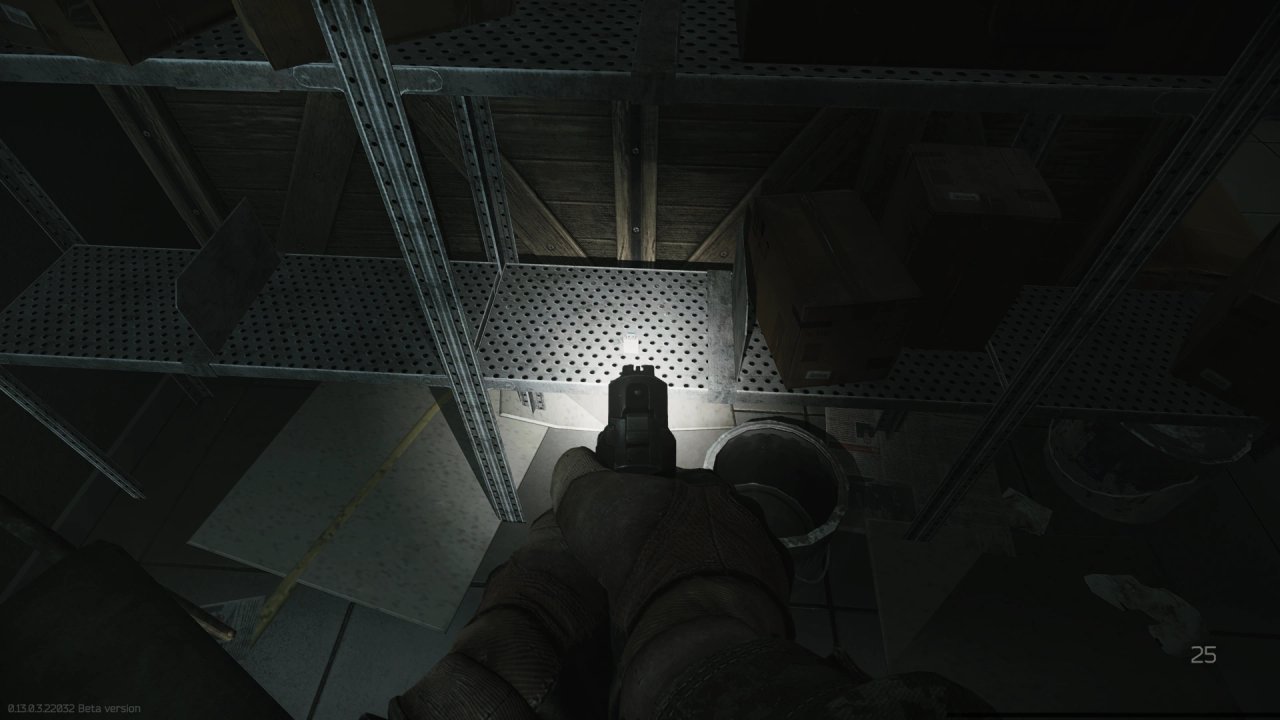
officeへの道 1
Way to the office 1
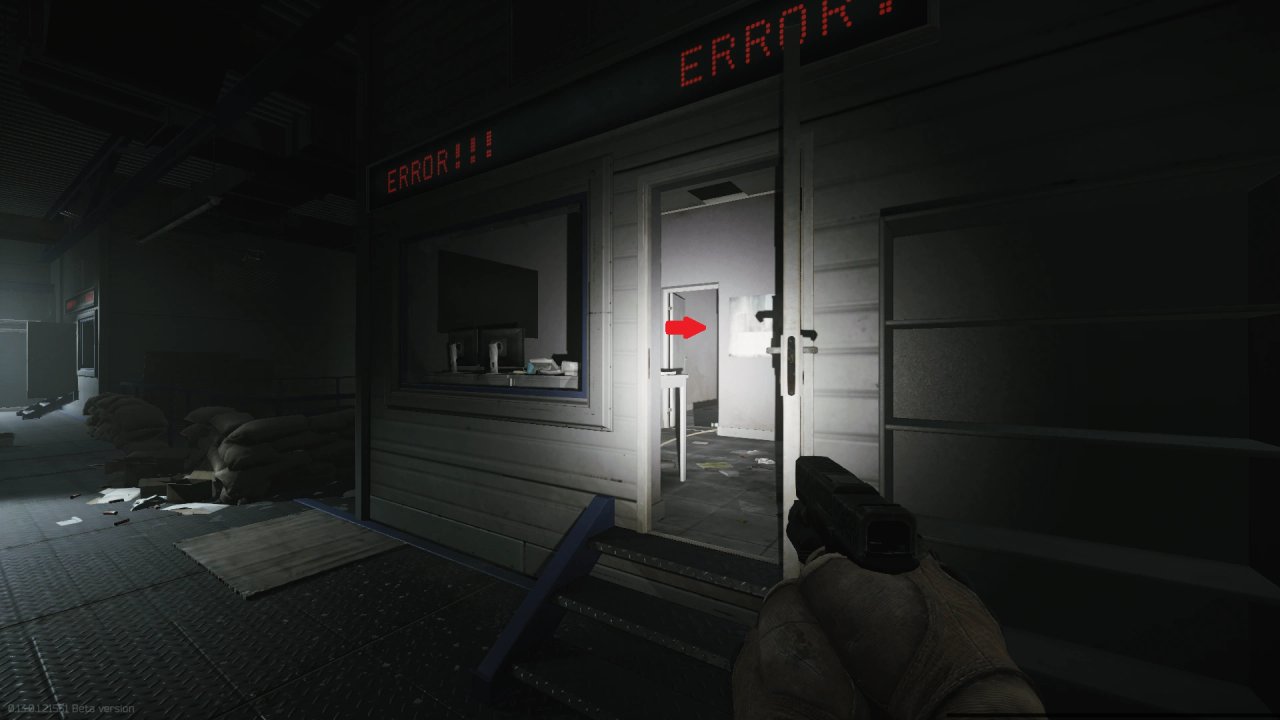
officeへの道 2
Way to the office 2
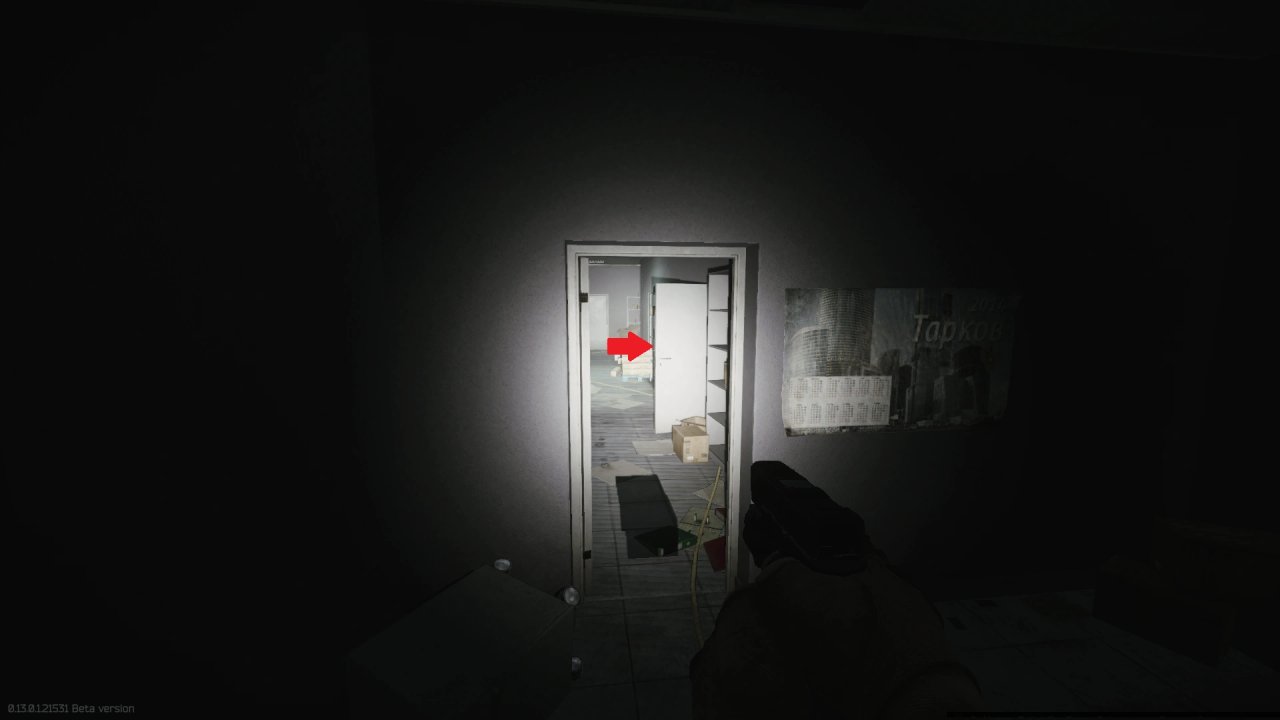
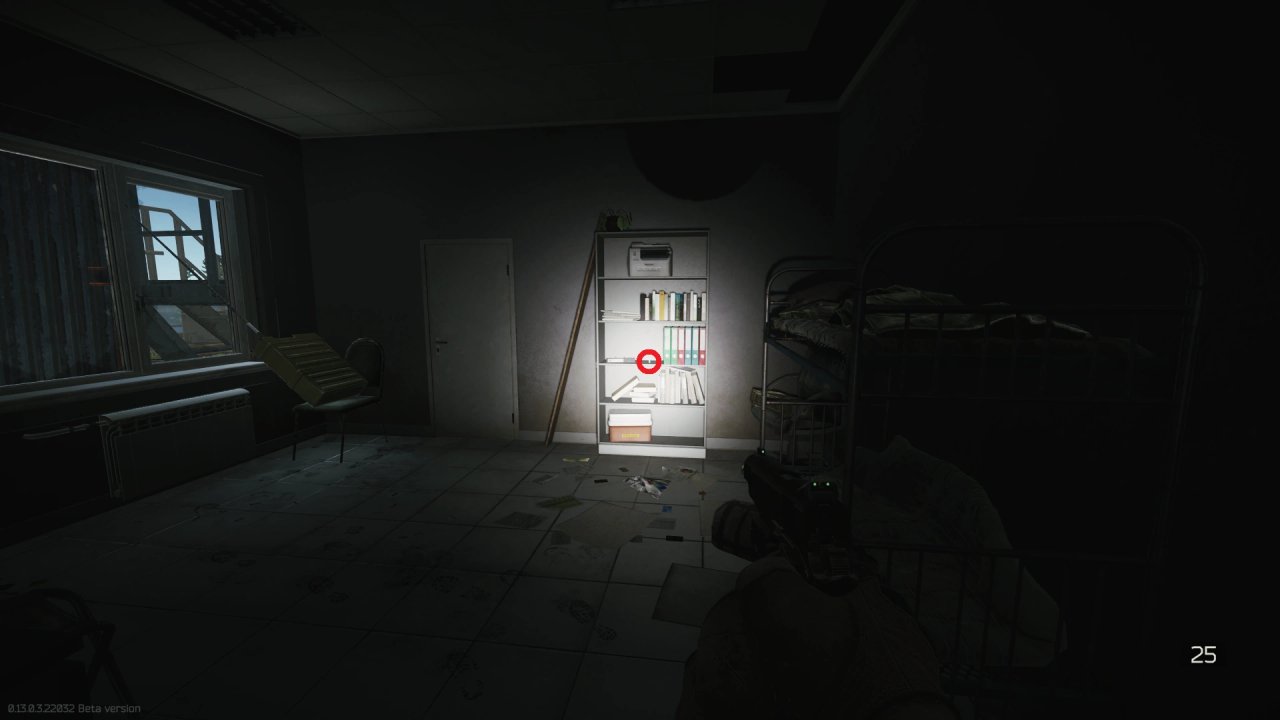
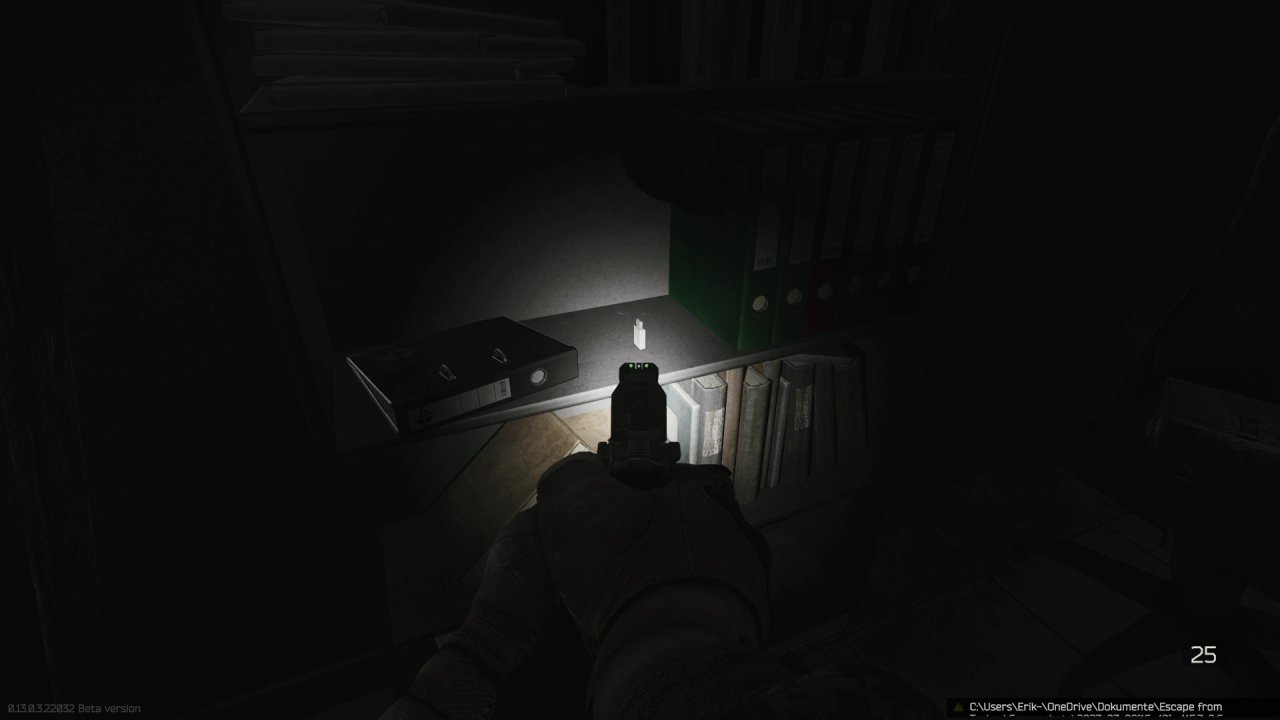
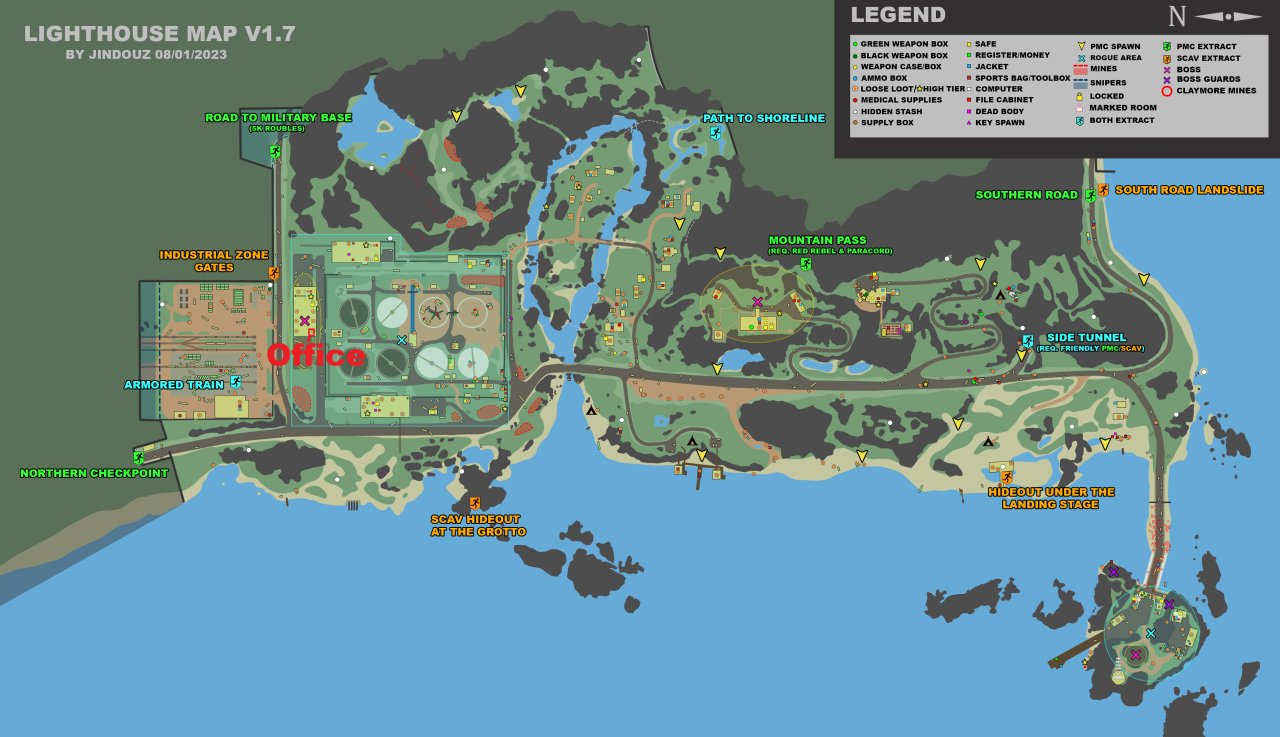
マップ上でマークされた Office
Office marked on map
office
The office
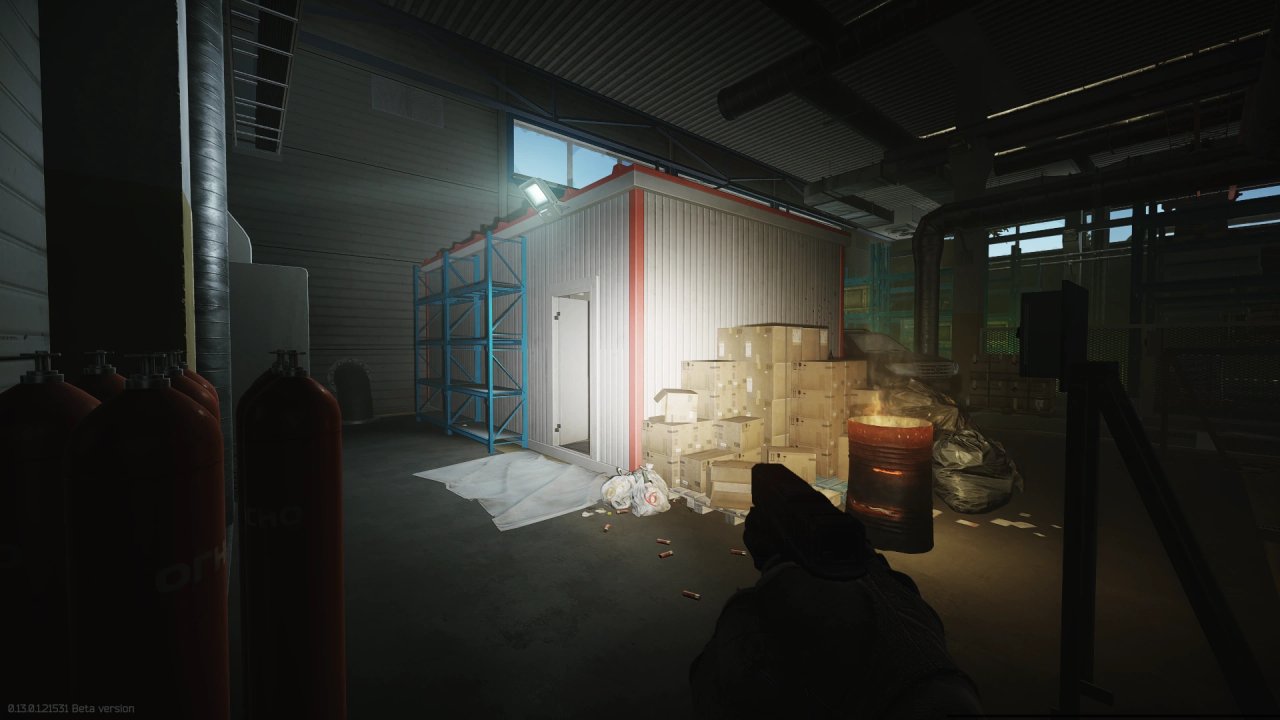
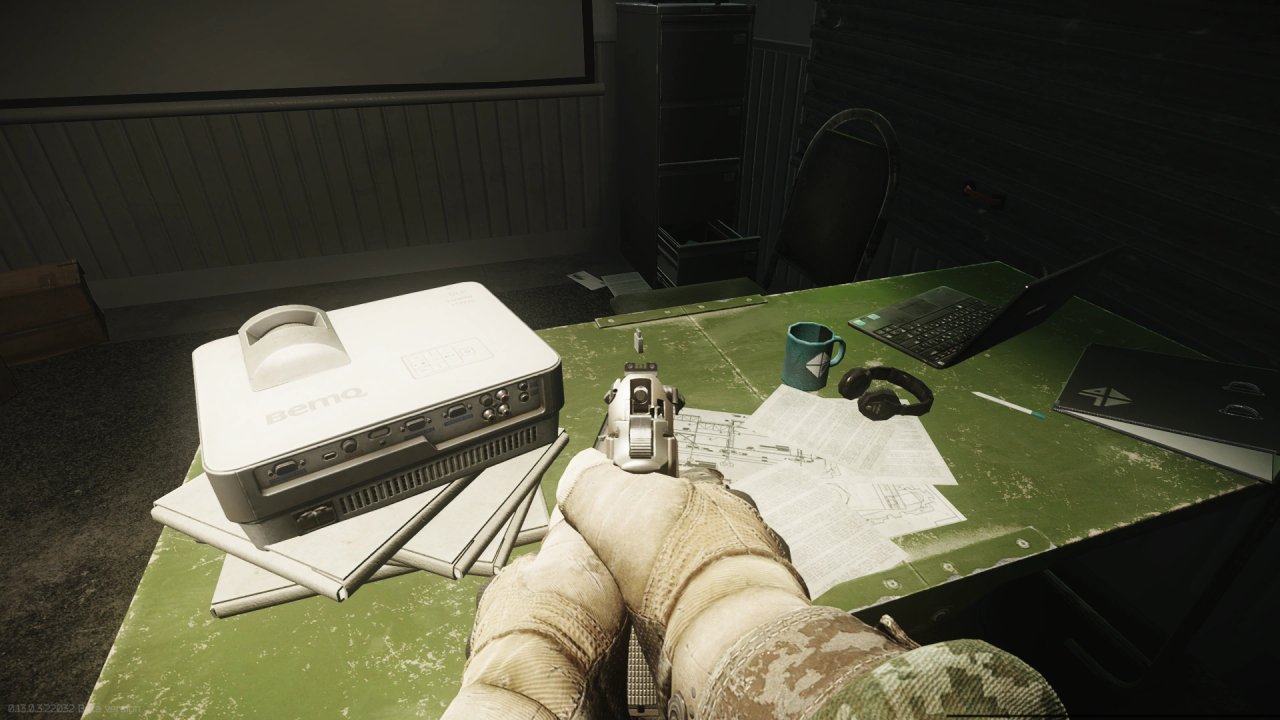
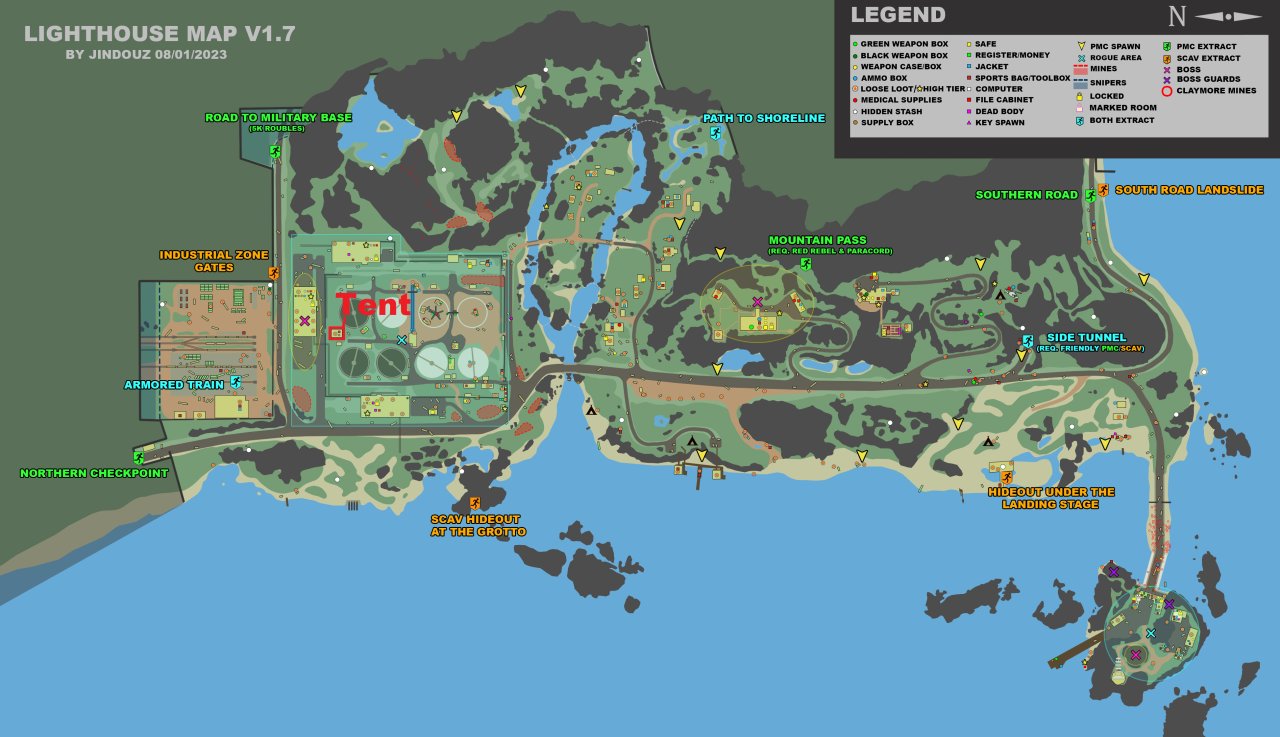
マップ上のTent
Tent marked on map
そのTent
The tent
Deskの場所
Desk location
Barrelの場所
Barrel location
マップ上のTent
Tent marked on map
そのTent
The tent
マップ上のWatchtower
Watchtower marked on map
そのWatchtower
The watchtower
officeへの道 1
Way to the office 1
officeへの道 2
Way to the office 2
Shelfの場所
Shelf location
Shelf内のFlash drive
Flash drive in the shelf
Deskの場所
Desk location
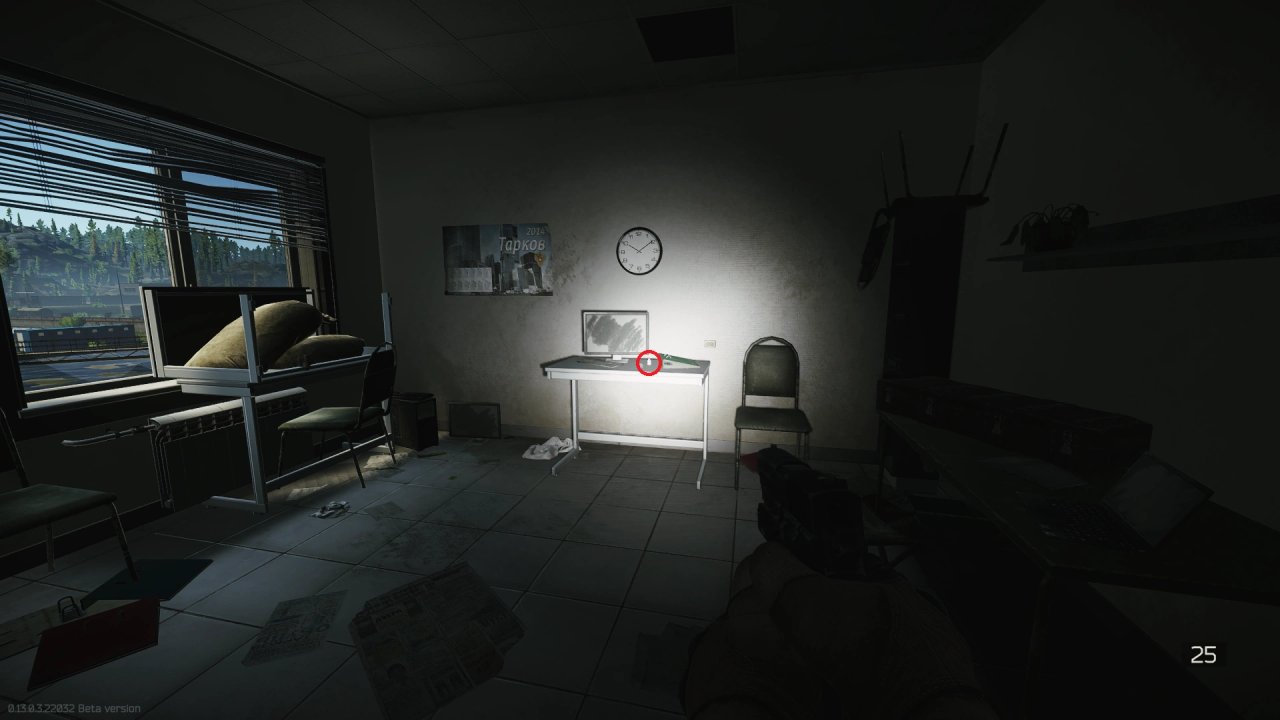
Desk上のFlash drive
Flash drive on the desk
マップ上のShack
Shack marked on map
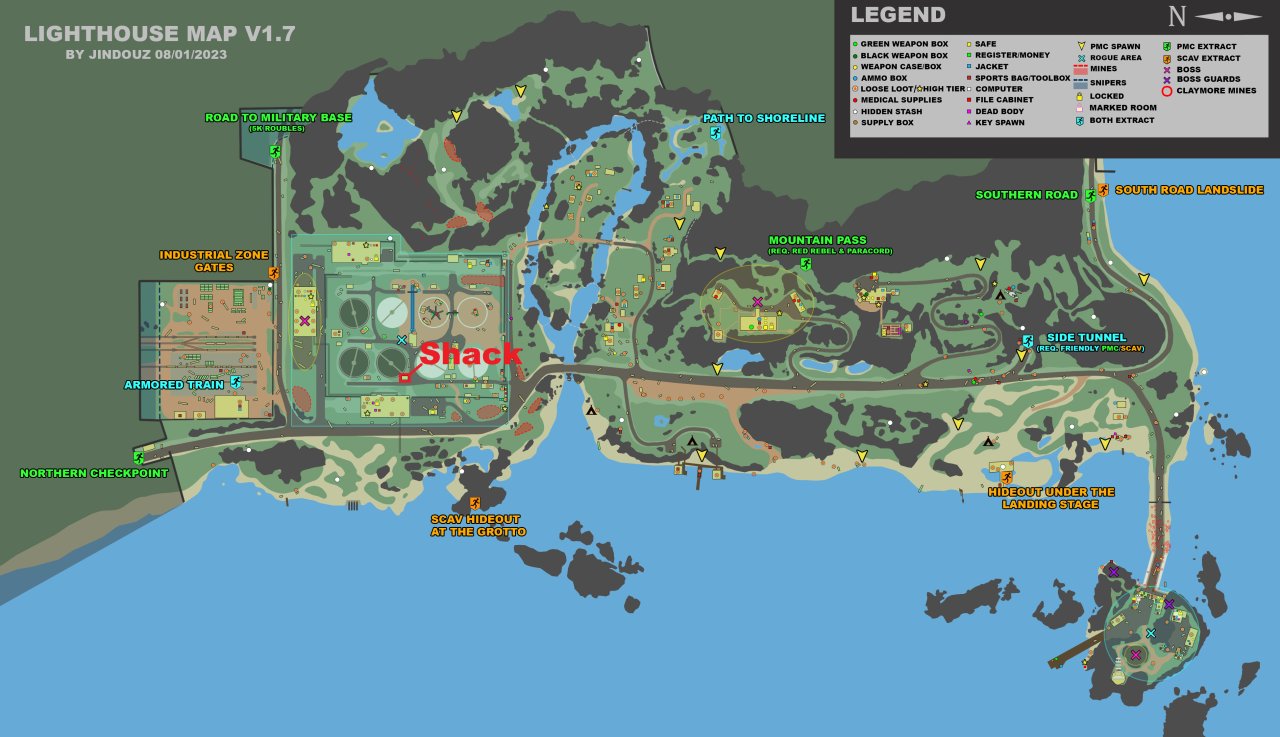
Shack
The shack
6. 注意点・よくあるミス
- Zryachiy(ズリャチ)を倒さないこと:
Zryachiyを殺害するとクエストに失敗し、このクエストへのアクセス権を失う可能性があります。 彼はこのクエストの進行に必要ないため、絶対に攻撃しないでください。 - マルチプレイ時の注意点:
マルチプレイで協力プレイを行う場合、パーティの全員が「encoded transmitter(暗号化された送信機)」を持っていない場合、送信機が「blocked(ブロック)」状態になり、橋を通過できなくなることがあります。
7. クリアできない時の確認リスト
- 電力の確認: 再フラッシュの際、電力が切れていないか確認してください。
- アイテムの確認: 取得した「V3 Flash drive」が、クエストアイテムとして正しく認識されているか確認してください。
- 場所の確認: 「lighthouse building」に実際に足を踏み入れているか確認してください。
- Zryachiyの生存確認: 誤って彼を攻撃していないか確認してください。
8. 関連タスク
- 前提タスク(Previous): To the Light – The Other Side
- 次のタスク(Leads to): Information Source